There is nothing that says summer more than the great Kiwi barbecue.
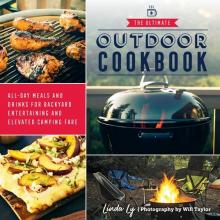
It is always good to get some fresh inspiration for the barbecue and the Ultimate Outdoor Cookbook provides that.
While it is written for an American audience - if reality television is anything to go by then they take their barbecue seriously - it easily translates for New Zealanders.
Author Linda Ly is a great fan of cooking over wood, but the recipes can easily be done on a gas or charcoal barbecue.
So whether you are set up at your favourite camping site, at the crib or in your own backyard, happy summer barbecuing.
 French toast rolls with blueberries and cream
I love finding interesting new ways to make and serve old favourites, like French toast. This variation uses a loaf of sandwich bread - just plain ol’ white bread, and fresh at that - to turn the traditional toast into French toast roll-ups stuffed with blueberry preserves.
The whole batch cooks at once on a plancha so everyone can enjoy them while they’re hot and toasty. (That’s a real sticking point for me when it comes to making breakfast items such as French toast and pancakes) Don’t skimp on the velvety whipped cream by using store-bought.
The creme fraiche adds just the right amount of tang to cut through the sweetness of the French toast and it gives the cream extra body and smoothness, almost like eating clouds.
Serves 4
For the whipped cream
¼ cup (56g) creme fraiche
2 Tbsp (15g) confectioners’ sugar
1 cup (240 ml) heavy cream
For the French toast
2 large eggs, beaten
⅓ cup (80ml) milk
2 Tbsp (25g) granulated sugar
½ tsp ground cinnamon
¼ tsp kosher salt
16 slices soft white sandwich bread, crusts removed
Blueberry preserves, for spreading
2 Tbsp (28g) butter
1 ½ cups (220g) fresh blueberries
Maple syrup, for serving (optional)
Method
To make the whipped cream: At least 30 minutes before you plan to make the whipped cream, place a large deep bowl and large balloon whisk in the freezer to chill. You want to start with very cold tools and ingredients for successfully whipping the cream. Alternatively, if using a handheld electric mixer, stand mixer, or high-powered blender, there is no need to freeze the whisk or bowl.
In a small bowl, using a fork, mix together the creme fraiche and confectioners’ sugar until combined.
In the chilled bowl, using the chilled whisk (or using an unchilled bowl with the handheld mixer, stand mixer, or blender on medium to medium-high speed) beat the heavy cream until stiff peaks form. Using a rubber spatula, gently fold the creme fraiche into the whipped cream until smooth and blended. Cover and refrigerate until ready to serve.
To make the French toast: Prepare a medium single-level fire in a fire pit or charcoal grill with a grill grate over the coals.
In a medium bowl, whisk the eggs, milk, granulated sugar, cinnamon, and salt until well blended. Set aside until needed.
Using a rolling pin, roll out each slice of bread to 0.3 cm thickness.
Spread a thin layer of blueberry preserves on each slice of bread and roll each tightly into a cylinder, up and away from you. Dip each roll into the egg mixture until lightly coated on all sides.
Place a well-seasoned plancha on the grate and preheat for at least 5 minutes.
On the plancha, melt the butter, spreading it around to evenly coat the surface. Arrange the rolls in a single layer on the plancha (flat grill plate). Cook until all four sides are golden brown, 1 to 2 minutes per side.
Remove the whipped cream from the fridge and give it a few turns with a whisk.
Serve the French toast rolls with a dollop of whipped cream, a handful of fresh blueberries, and maple syrup for dipping (if desired).
The secret to a juicy burger
Biting into a juicy burger that melts in your mouth is one of life’s great pleasures. But if you often find your patties tough and dry, these six secrets might just fix that problem.
5. Resist the urge to flatten it. Put down that spatula! While it might be tempting and even seem natural to flatten the burger as it cooks, doing so only guarantees you’ll press all those delicious juices out of the meat and into the flames. Try this trick instead: Make a large, shallow dimple in the middle of the patty with your thumb after you shape it. Ordinarily, when meat hits the grill, the edges of the patty heat up and cook more quickly than the middle, resulting in a puffy centre. The dimple works to counteract this effect.
6. Griddle don’t grill your burgers. If you have a tendency to overcook your burgers, grill it on a plancha or in a cast iron skillet instead. Cooking the burger in its own fat renders the beef even more tender and flavourful.
 Beef and chorizo bunless burger stacks
These vegetable-laden stacks utilise one of my favourite burger tricks - incorporating the cheese into the meat. Here, I grate the pepper Jack (a type of Monterey cheese) right into the meat and it bastes the burger as it grills, making the meat extra juicy.
Serves 4
567.5g ground chuck steak (mince)
225g Mexican chorizo, casing removed
1½ tsp kosher salt
¾ tsp black pepper
1 cup (115g) grated pepper Jack cheese
1 globe eggplant, cut into 1cm slices
Olive oil cooking spray, for preparing the eggplant
8 to 12 butter lettuce leaves
2 beefsteak tomatoes, cut into 1cm slices
1 avocado, cut into 0.6cm slices
Prepare a medium-hot two-zone fire in a fire pit with a grill grate over the coals.
Method
In a large bowl, lightly mix together the mince, chorizo, salt, and pepper with your clean hands until combined but still fluffy in texture. Mix in the cheese until evenly distributed. Divide the beef mixture into four equal portions and roll each into a ball. Gently pat each ball into a pattie about 2cm thick and press down in the centre of the pattie with your thumb to make a large dimple.
Lightly mist the eggplant with cooking spray and season it with salt and pepper.
Arrange the eggplant on the grate over direct heat. Grill for about 3 minutes per side, until softened and lightly charred. Transfer the eggplant to a sheet pan.
Arrange the beef patties on the grate over direct heat. Grill undisturbed for four minutes. Flip the patties and grill for about four minutes more, until an instant-read thermometer inserted into the centre of the meat registers 71degC.
Assemble each burger by layering two or three lettuce leaves on the bottom, followed by an eggplant slice, tomato slice, two avocado slices, another eggplant slice, a beef pattie, another tomato slice, another eggplant slice, and two avocado slices on top. Secure the stack with a long toothpick.
FOIL PACK 101
Foil packs are nearly foolproof in their simplicity, and the learning curve is as short as these three little tips.
Oil it - A thin layer of oil keeps food from sticking to the foil. I always start with a fine mist on the surface I’m working on, even if my ingredients are well sauced or well buttered. And contrary to what you may have heard, neither side of the foil (shiny or dull) makes a difference in how heat reflective or heatproof it is.
Grill it - You can certainly set your foil packs right on the coals, but I prefer using a grill grate so I have more control over temperature. I can dial down or turn up the heat as little or as much as I need, and I don’t have to worry about losing my food to the fire if I accidentally put a hole in the foil.
Rotate it - With varying levels of heat coming at it from every which way, a foil pack is bound to cook unevenly if it sits in one spot. Rotate your packs every few minutes, and even shuffle them around the grill to account for hot spots and cool spots.
PERFECTING THE FOIL PACK
The perfect foil pack begins with a roll of heavy-duty aluminum foil and a can of olive oil cooking spray.


Garlicky salmon
Garlic lovers, this recipe is for you! And it is so easy to pull off. You can pick up a salmon on your way home and prepare it in a few minutes with a handful of pantry staples. I love serving a large platter of salmon like this alongside grilled vegetables for a well-rounded meal that requires little hands-on time and even fewer dishes to do. It is a weeknight win all around!
Serves 4
2 Tbsp (28g) butter
6 garlic cloves, chopped
2 Tbsp (30ml) dry white wine
1 Tbsp (15ml) fresh lemon juice
Olive oil cooking spray, for preparing the aluminum foil
1 (681g to 908g) side of salmon
Kosher salt
Ground black pepper
1 lemon, halved crosswise
Finely chopped fresh parsley, for garnishing
Method
Prepare a medium-hot single-level fire in a fire pit or charcoal grill with a grill grate over the coals.
On the stovetop, in a small saucepan over medium heat, melt the butter. Add the garlic. Cook until fragrant, one to two minutes. Stir in the white wine and lemon juice. Bring the sauce to a simmer, cook for one minute, and remove from the heat.
Measure a sheet of heavy-duty aluminum foil (at least 45cm, long, or long enough to wrap the salmon) and lightly spritz the surface with cooking spray.
Pat the salmon dry with paper towels and place it in the centre of the prepared foil sheet. Pour the sauce evenly over the top and season with salt and pepper. Fold and seal the foil into a packet.
Place the packet on the grate. Grill for 10 to 12 minutes, rotating the packet every three to five minutes for even cooking. (Depending on the thickness of your salmon, cooking time may vary by a few minutes.) Transfer the foil packet to a sheet pan and use caution when opening, as it will be full of steam. The salmon is done when the flesh flakes easily with a fork and an instant-read thermometer inserted into the thickest part of the flesh registers 49degC to 52degC.
Lightly mist the lemon halves with cooking spray and place them, cut-side down, on the grate. Grill for about five minutes, until the edges are charred.
Squeeze the lemons over the salmon and garnish with a sprinkle of parsley.
MAKING THE CUT
What are the differences between salmon cuts?
Side of salmon
This impressive cut is a single, large fillet that runs the length of the fish and has been cleaned and deboned. A whole side of salmon averages 1.8kg to 2.3kg, feeding eight to 10 people, but can be cut into smaller sections. It’s best for grilling in foil or grill-roasting on a plank, because the delicate flesh and large size make it hard to turn over. A side of salmon can be served family style or cut into individual fillets for plating.
Salmon steak
This uniformly thick piece of salmon is cut perpendicular to the spine, resulting in a U-shaped cross-section that includes the skin and bones. Each hefty 225g to 280g steak truly feels like a steak with its meaty texture, making it ideal for searing on a plancha or in a cast iron skillet. Salmon steaks can sometimes be hard to find at the fish counter, so it’s best to call ahead or special order what you need. For most recipes that call for salmon steaks, fillets can be used in their place with an adjustment in cooking time.
A general rule is to allow five minutes of cooking time for each 1cm of thickness.
Salmon fillet
When you slice a whole side of salmon into 170g to 225g portions, you get fillets.
Most fillets are cut from the tail end of the fish, and the tapering thickness often leads to overcooking the thinner piece of flesh.
To remedy this, ask your fishmonger to give you centre-cut fillets, which have an even thickness.
If you’re cooking for four people, ask the fishmonger to cut a whole side of salmon in half and give you the thicker half. You’ll end up with about a 900g fillet you can cut into smaller fillets at home. They can be grilled with the skin on, grilled in foil, or grilled on a plank or plancha.

Avocado toast has become very popular in casual cuisine, and I, too, am a fan! Somehow, this simple little concoction makes sense for any and every occasion: as a midday snack or happy hour nibble, assembled for brunch or devoured for dinner. When you top it with spicy grilled shrimp, it’s the perfect summer nosh for feeding a crowd. Just add margaritas!
Serves 4
For the avocado spread
2 avocados, halved lengthwise and pitted
1 tomato, diced
2 garlic cloves, minced
Juice of 1 lime
Handful finely chopped fresh cilantro, (coriander ) plus more for garnishing
½ teaspoon kosher salt, plus more for seasoning
For the shrimp (prawns)
2 tablespoons (30ml) olive oil
Juice of 1 lime
½ tsp ground cumin
½ tsp ground coriander
½ tsp red pepper flakes
454g medium shrimp (prawns), peeled and deveined
Kosher salt
1 loaf artisan bread, cut into 1cm slices
Olive oil cooking spray, for preparing the bread
Prepare a medium-hot single-level fire in a fire pit with a grill grate over the coals.
Method
To make the avocado spread: Scoop the avocado flesh into a medium bowl and smash it with a fork. Add the tomato, garlic, lime juice, cilantro, and salt.
Stir to combine. Taste and add more salt, as desired. Set aside until the toasts are ready for assembly.
To make the shrimp (prawns): In a large bowl, whisk the olive oil, lime juice, cumin, coriander, and red pepper flakes until combined. Add the shrimp and toss to coat. Cover and refrigerate for 15 minutes (but no more than 30 minutes).
Lightly mist both sides of the bread slices with cooking spray. Arrange the bread on the grate. Grill for about 30 seconds per side, until toasted brown and lightly charred. Transfer the toasts to a sheet pan (baking tray).
Thread the shrimp on to skewers and season both sides with salt.
Place the skewers on the grate. Grill for about 2 minutes per side, until the flesh is opaque and just cooked through. Pull the shrimp off the skewers and chop into bite-size pieces.
Top each toast slice with a thin layer of avocado spread and a few spoonfuls of shrimp. Garnish with cilantro and serve.
HOT TIP
If you have leftover bread at the end of the day, grill the slices and pulse them in a food processor to make grilled bread crumbs you can use in other recipes. Grilled bread crumbs can be frozen in an airtight container for up to three months.