Jampa, a Tibetan studying the hill town, invited Kleeman, a tourist, back to his place for a meal serving her thenthuk, a hand-pulled noodle soup.
"This smooth hearty broth banished the November cold from my bones, and its unique flavours had me sold," Kleeman says.
Fast forward from that meeting in 2009, the pair are married, have two young children and are living in Oxford in the United Kingdom where they run Taste Tibet, a restaurant, shop and festival food stall.
"Yeshi brings most of the food to our family table and he is Taste Tibet’s head chef and recipe developer."
Kleeman travelled extensively throughout China, did a degree in Chinese and moved to Beijing for work in 2006. She visited the Tibetan region many times, but did not have a great impression of Tibetan food until she met Jampa.

"By the time Yeshi and I met in 2009 he had quite a repertoire of dishes at his fingertips; nothing was written down and he cooked by instinct using whatever was available."
Despite concerns she could not adapt to a Tibetan diet, Keelman says after they got married in 2011 Tibetan food became a personal passion.
The couple have an allotment growing vegetables from seed often sent to them from relatives in Tibet.
Tibetans eat with the seasons and each mealtime is an occasion for the whole family, which has resulted in Kleeman re-evaluating her own relationship with food.
The cuisine uses liberal amounts of schuan peppercorns, tumeric and cumin and plenty of aromatics such as ginger, garlic and coriander.
Its distinguishing feature is that it is based on barley or wheat, crops which, unlike rice, grow well at altitude. Bread is often the accompaniment to the main meal, as well as a fair amount of dairy.

They continue this story in their book, Taste Tibet, Family Recipes from the Himalayas, providing information on the culture and how to cook Tibetan food.
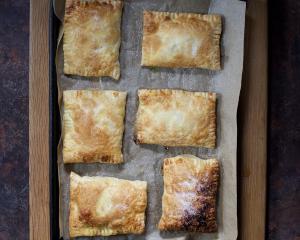
The book is broken up into chapters for breakfast, cold dishes, rice and stir fries, noodles, soups and stews, dumplings, pasties and bread, sauces and dips, street food favourites and finally a sweet tooth section.
All recipes come with information on the history of a dish and how it is traditionally eaten.
THE BOOK
Images and text from Taste Tibet by Julie Kleeman and Yeshi Jampa, food photography by Ola O. Smith, travel photography by Keiko Wong. Murdoch Books, RRP $55.

Tibetan meatball soup
In Tibet, the practice of brides taking several husbands from the same family has been commonplace since ancient times. Yeshi’s mother married two brothers, and Yeshi and his brothers and sisters know them simply as older father and younger father.
Officially, this system is now forbidden under Chinese law, but in rural areas it remains normal practice. Given the specific challenges of Tibet’s topography, it has advantages: with little arable land available, and much labour needed to tend it, the marriage of a family’s sons to one bride ensures that the land stays within the family, and that there are sufficient hands to both work in the fields and guarantee a male presence in the home. The practice also tends to reduce the number of heirs, and hence the number of mouths the land must feed.
Although Yeshi’s younger father is now vegetarian, he used to enjoy meatballs, way back when. Yeshi remembers that this dish would be his contribution to weddings and other major events taking place in the village. Weddings typically last two or three days and have up to 400 guests, so you can imagine how many meatballs would be needed!
Serves 4
350g minced (ground) beef, ideally 15%-20% fat content
1 free-range egg
½ small red onion, finely chopped
1 large garlic clove, finely chopped
½ tsp crushed Sichuan peppercorns (yerma)
1½ tsp ground coriander
1 tsp salt
Plain (all-purpose) white flour, for dusting
125g baby spinach leaves, washed
Coriander (cilantro) leaves, to garnish
Method
Place the minced beef in a mixing bowl and crack in the egg. Mix together very well using your hand or a fork, then add the onion, garlic, Sichuan pepper, coriander and ½ teaspoon of salt and mix everything together thoroughly.
Sprinkle a little flour on to a chopping board. Pinch off a 2.5cm piece of the meat mixture and roll it between your palms to make a ball, then roll it through the flour on the board. Don’t douse it in flour — you are aiming for a light coating. Pick up the meatball and roll it between your hands again, then give it another roll in the flour before setting aside. Repeat with the rest of the meat mixture, adding a little more flour to the board as needed. You should end up with about 30 meatballs all told.
Measure out 1 litre (4 cups) of boiling water into a large wok and place over a medium heat. When the water returns to the boil, add the meatballs and stir them around gently, adding a little more water if the meatballs are not fully covered. Add the remaining ½ teaspoon of salt, turn the heat up as far as it will go and simmer the meatballs for 45 minutes, stirring occasionally. In the final minute of cooking, add the spinach to the soup.
Just before you take the wok off the heat, check the meatballs are cooked by fishing one out and cutting it open: it should be brown all the way through, not pink.
Serve the meatball soup in bowls, garnished with coriander.

Tibetan cheese is complex in flavour: sharp/sweet and with herbal hints, it makes for delicious dumplings.
Feta is a good substitute here. It has all the sour creaminess of Tibetan cheeses and its crumbly texture means the filling is quick to prepare. Yeshi’s mother likes to pair the cheese with pak choi, picking it while it’s still very young and tender.
Otherwise, spinach makes the momos very juicy and the stems give a nice crunch, so don’t discard these as you chop. Serve your cheesy momos with tomato sepen.
Makes 40
For the dough
500g self-raising flour, plus extra for dusting
For the filling
3 bunches of whole-leaf spinach, about 500g in total
1 tsp salt
2 Tbsp cooking oil
200g feta cheese, finely diced
Method
For the dough, put the flour into a mixing bowl. Slowly pour about 250ml of warm water into the flour with one hand, while mixing with the other. Add just enough water to make a dough — you don’t want it to get too sticky. Knead until the dough forms a ball in the bowl, then cover and set aside for 15-20 minutes.
Meanwhile, make the filling. Finely chop the spinach. Ideally, the pieces should be as small as 5mm. Put it into a large mixing bowl, then fill the bowl with water and wash the spinach by swirling it with your hand. Leave it to stand for 2 minutes, then swirl again. Transfer the spinach to a colander in the sink and leave to drain for a minute or two. Rinse out the mixing bowl and tip the spinach back into it. Add the salt and oil and mix well by hand, then leave to stand for about 5 minutes.
Put the feta into another mixing bowl. Now transfer the spinach into the feta bowl, batch by batch. Squeeze the spinach between your hands as you lift it out, so that any excess liquid drains back into the original bowl before you add it to the feta for the filling (otherwise, the momos will be soggy and hard to wrap). Mix the spinach and feta together well.
Take the dough out of the bowl and knead it for a couple of minutes, then divide it into four equal pieces and return to the bowl. Sprinkle a little flour on to your work surface but don’t overdo it, as too much flour can stiffen the dough, making the momos harder to wrap later.
Take the first piece of dough, keeping the rest covered in the bowl to stop them drying out. Roll out the dough into a sausage shape about 25cm long, then cut into 10 equal slices, lightly flattening each one with your hand.
Using a rolling pin, and making one wrapper at a time, push and pull the flattened piece of dough up and down quickly and firmly, holding it with your spare hand and turning it little by little as you go. The middle should end up a bit thicker than the outer edges, and it should fill the palm of your hand; it doesn’t need to be a perfect circle.
When you’re ready to fill, wrap and fold your momos, shaping them however you like.
For best results, steam these momos over a high heat for about 13-16 minutes, cooking them in batches according to the size of your steamer.
Yeshi says: If you have any filling left over, it goes really well in a salad — just add some sliced red onion or avocado, for example, and off you go.

Yeshi describes this as simple fast food, so we hope you will also find it easy to recreate. It can form the basis of a more deeply flavoured soup depending on how far you want to take it, and how much extra soy and vinegar you want to add. Chilli too, of course.
There’s lots of scope for other additions as well. Slivers of carrot are good, and we often cook a little omelette in a small frying pan, cutting it into strips before adding a little to the top of each bowl on serving.
Serves 4-6
Salt
2 Tbsp cooking oil
2 large garlic cloves, thinly sliced
400g pak choi, washed and roughly chopped
1 Tbsp sesame oil
1 Tbsp light soy sauce, plus extra to serve
1 Tbsp Chinkiang black vinegar, plus extra to serve
½ tsp crushed Sichuan peppercorns (yerma)
3 spring onions (scallions), washed and thinly sliced
Taste Tibet sepen and son labu to serve (optional)
For the noodles
500g (3½ cups) strong white bread flour, plus extra for dusting
3 large free-range eggs
Method
Put the flour into a mixing bowl and crack in the eggs. Mix the eggs through the flour with your dominant hand, while slowly pouring in about 100ml of warm water with the other depending on the flour you are using, you may need to add slightly more water. Work the dough into a ball in the bowl, then cover and set aside for about 15 minutes.
Take out the dough and knead it for a minute or so until smooth, then divide it into four roughly equal pieces. Return three of the pieces to the mixing bowl and cover again.
Using a rolling pin, roll out the first piece of dough on a flour-dusted work surface. Press down hard, turning it around and around and over and over until you have a large, roughly circular sheet of dough about 23mm thick. Finally, sprinkle a little more flour on to the dough and, starting from one side, roll the sheet of dough up and over the rolling pin, wrapping it around several times until you reach the other side.
Now slide out the rolling pin to leave behind a hollow cylinder of dough. Using a sharp knife, cut the cylinder into slices on the diagonal. The width of the slices will determine the thickness of your noodles its good to aim for a chopsticks width.
When you are done, sprinkle a little more flour over the noodles. Using both hands, lift them and dance them about in the flour until all of them are coated and you can prise them apart. Place in a mixing bowl and repeat with the remaining balls of dough.
To cook the noodles, bring 2.5litres (10 cups) of water to the boil in a large saucepan. When the water is boiling, add a teaspoon of salt and half the noodles. Stir the noodles very gently, ideally using chopsticks, then add the rest of the noodles and give them a very gentle stir too you don’t want to break them in the process. Leave them to boil for about 5 minutes, then taste one to see if they are cooked. When the noodles are done, turn off the heat, but do not drain them.
Meanwhile, heat a wok over a high heat. Add the oil, and when its hot, turn the heat down to low-medium and add the garlic. It should take less than a minute for this to turn golden brown, at which point add the pak choi and stir-fry briskly for about a minute. Now add the sesame oil, soy sauce, vinegar and a teaspoon of salt and keep stirring for a further 1-2 minutes, or until the vegetables have softened and reduced, releasing their juices in the pan.
Carefully tip the contents of the wok into the pan of noodles, rinsing out the last of the veg in the wok using some of the water from the noodles. Gently stir everything together, then serve in large bowls and garnish with the spring onions. Add some sepen if you want a chilli kick, and a dash of extra soy sauce or vinegar to taste.
Serve with a small bowl of pickled mooli on the side, if you have some in the fridge.
Son Labu (Tibetan Pickled Mooli)
Tibetan people love pickling. It is a great way to preserve vegetables until the next growing season. In the late autumn, Yeshi’s family makes two or three massive jars of pickled mooli that last them until spring. Spicy, sour and salty, this can be snacked on at any time during the day, but it is also brought out at mealtimes to enjoy alongside other dishes. Pickled mooli can be added to stir-fried meat dishes as well for a bit of pungency, or in place of fresh vegetables over the barren winter months.
Traditionally, pickling brine is not usually thrown out. Instead, the leftover brine is topped up with salted water and the jar is filled up again with more mooli. The only important point to note is that you must make sure no oil gets into the bowl or jar, or it will contaminate and spoil the pickles.
Makes about 2.5kg
3 mooli (daikon), about 1.5kg in total, washed but not peeled
2 Tbsp sea salt flakes
5-6 dried red chillies, about 50g
2 Tbsp crushed Sichuan peppercorns
200g garlic cloves, about 5 bulbs (peeled but left whole)
2 Tbsp whole garam masala spices
Method
Chop the mooli into circular chunks about 1cm thick. Place in a large bowl, add the salt and mix it through very well. Crush the chillies slightly between your fingers, just enough to release some of their heat, then add to the bowl, along with the Sichuan peppercorns, garlic and garam masala.
Mix everything together, then transfer directly into an airtight container, preferably earthenware, ceramic or glass, but if all you have is plastic, that is fine too. The most important thing is that your container has a lid that seals well.
Press the mooli down into the container, then add 1.25 litres (5 cups) of cold water to the bowl. Give it a swirl to rinse out any remnants, then pour over the mooli. Seal the container and leave in a cold place (ideally the fridge) for about 3 weeks before using. The pickled mooli should then keep well for at least 6 months.
Yeshi says You can pickle almost any vegetable in this way as long as it is nice and fresh. Mooli is my favourite, but I also enjoy Chinese (napa) cabbage.
Sepen (Hot Chilli Dip)
This unique and fiery dip can be used as the basis of many different chilli sauces, and is the perfect accompaniment to most Tibetan dishes. We hope that it will become your go-to condiment. The principal ingredient is chilli, but as it is slow-cooked with Sichuan pepper and other spices, there is a gentle release of heat in the mouth and it is a complex and intriguing set of flavours, rather than a sudden chilli hit. The good news is that sepen is the gift that keeps on giving: because it is a fairly dry mix you can store it in the fridge for many months, taking a bit out at a time and maybe adding a little light soy sauce or Chinkiang black vinegar, depending on what you are enjoying it with and how you fancy it on the day.
Serves about 100g
3 large garlic cloves
6 cm piece of ginger, washed but not peeled, roughly chopped
1 tsp salt
½ tsp Sichuan peppercorns (yerma)
1 tsp coriander seeds (or ½ teaspoon ground coriander)
½ tsp cumin seeds
170 ml cooking oil
50 g hot chilli flakes
1 Tbsp sesame oil
Method
In a blender or small food processor, blend the garlic, ginger, salt, Sichuan peppercorns, coriander and cumin seeds to a rough paste, adding a tablespoon of water to help everything move a bit more easily. (If you do not have a blender, you can chop or grind everything by hand, just make sure that everything is as finely chopped or crushed as you can get it.)
Put 1 tablespoon of oil into a frying pan over a medium heat. When it is hot, add the blended ingredients to the pan and cook for 4-5 minutes, stirring constantly to make sure nothing burns. You can add a drop of water if necessary, but definitely do not add too much. When you have a nice, dry paste, add the chilli and mix everything through, then turn off the heat and set aside to let the flavours mellow a little in the pan.
Meanwhile, in a saucepan, heat 150 ml of oil until it is very hot (you can test it by dropping in a tiny amount of your chilli mix — if it is hot enough, you should get a good sizzle). Put the frying pan back over a low heat and carefully pour the hot oil into the pan. It should really sing as it hits the chilli. Stir briskly for 4-5 minutes. Keep a very close eye on it, and take it off the heat immediately if it looks like its starting to burn. As soon as the chilli darkens to a rich reddish-brown, it is ready.
Quickly decant the sepen into a serving bowl and keep stirring for a further minute, then add the sesame oil and stir it through. Allow it to cool a little before serving.
Yeshi says: A jam jar is a good vessel to store sepen in, but whatever you use, make sure the sepen is cool before you put it away. It will keep in the fridge for months.