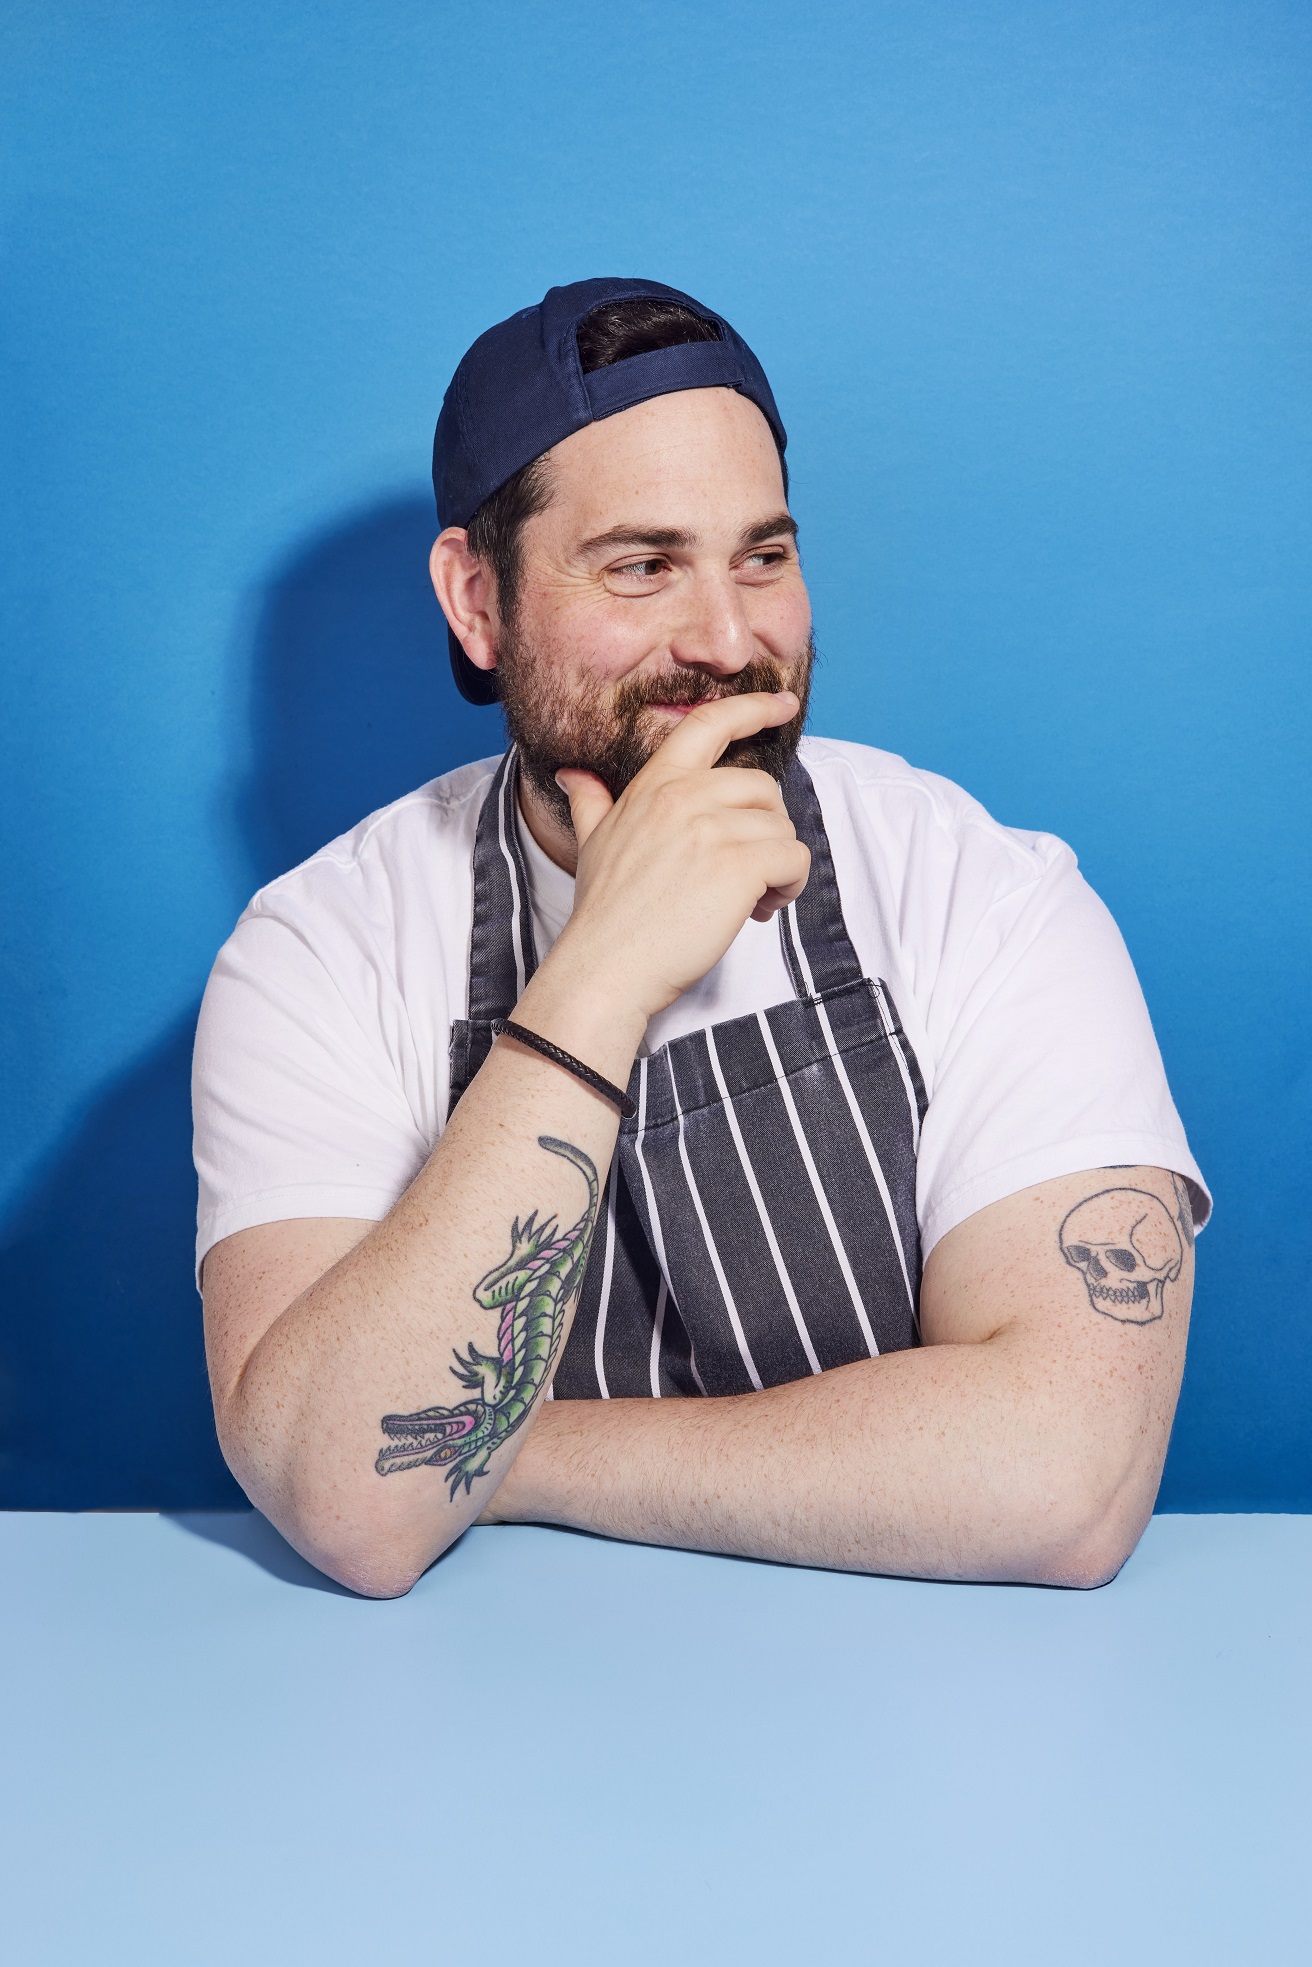
In fact, he got into the food business when he was at Manchester Metropolitan University 10 years ago. He saw a gap in the market for late-night delivery of baked goods and desserts, so created his own team to deliver direct.
He put baking aside for a while to work in a burger restaurant, but returned to his first love just before the pandemic.
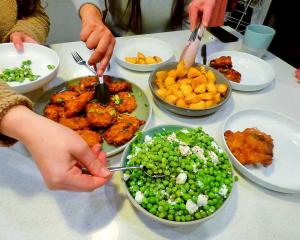
His Get Baked dessert business in Leeds, which specialises in cookies, brownies, cakes and pies, hit the headlines when Meyers banned the use of United States sprinkles. He then declared he would never use the inferior British variety and boycotted all sprinkles until he created his own that did the job to his satisfaction.
Now known as "Mr Sprinkles", Meyers has written his first cookbook, featuring some of his shop’s favourite recipes, such as Raspberry Glazed Donut Cookie, Lemon Meringue Pie, Mr Pistachio, Purple Haze, SMores Brownies, Campfire and Birthday Truffles, culminating in the famous "Bruce", a 24-layer giant consisting of chocolate cake and ganache, that people travel far and wide to buy.
"Get Baked embodies a philosophy that spends less time focusing on complicated combinations and techniques that don’t really matter and more time focusing on creating desserts that just taste delicious."

Meyer is known for his dry and sometimes "out there" writing style and unapologetically says he has done his best to impart as much of his personality as he can into the book.
The book is divided into chapters based on ingredients — chocolate, nuts, fruit, spice, sugar and, of course, "Bruce".
He advises those attempting to make his recipes to always weigh the ingredients, even liquids and do all the ingredients first before starting.
"Being organised makes everything a lot more fun."
THE BOOK
Images and text from Get Baked by Rich Meyers, photography by Ellis Parrinder. White Lion Publishing RRP $32.99.
 Morning buns
This isn’t my recipe, and I don’t even care. My good friend, the incredibly talented pastry chef and owner of Fluff Bake Bar in Houston, Texas, Rebecca Masson, gave it to me. She makes insanely good cinnamon buns, and I made some with her when I was doing a pop-up at her place. I said to her, "I’m just letting you know that these are going to have to go in my book, because they’re absolutely sensational." She agreed, so here we are.
The great thing is, they’re actually totally uncomplicated. It’s just about knowing when the dough is right, which comes with a bit of experience. Even if you don’t absolutely nail it, they’ll still taste amazing. The only slight change I made to her recipe is the addition of brown sugar in the filling. She doesn’t think it needs it. I do. I win.
Makes 6 buns
For the dough
350g plain (all-purpose) flour, plus extra for dusting
120g whole milk
70g caster (superfine) sugar
60g softened unsalted butter, plus extra for greasing
10g dried active yeast
5g sea salt
For the filling
100g softened unsalted butter
15g ground cinnamon
50g dark brown sugar
For the frosting
100g icing (powdered) sugar, sifted
100g cream cheese
50g unsalted butter, cubed
50g whole milk
5g vanilla extract
Method
To make the dough, put all the ingredients in the bowl of a stand mixer fitted with the dough hook attachment and mix on a slow-medium speed for 6 minutes, or until the dough is pulling away from the sides of the bowl. You can do this by hand, but honestly, why would you want to do that? You’re not Paul Hollywood. And even if you were, you’d still use the dough hook.
At this point, stop kneading and pull the dough out. Place the dough into the largest mixing bowl you’ve got (lightly greased with a very small amount of flavourless oil), cover it with a slightly damp tea towel and put it somewhere warm to prove. You’re looking for the dough to double in size, which will take at least an hour.
When your dough looks puffy as hell, dust your worktop with flour and — using a rolling pin, or a bottle of Robinson’s fruit cordial (honestly, I’ve seen it happen) — roll the dough out to a thickness of 1cm, doing your best to keep it rectangular in shape. This can be tricky, but just manipulate the edges by pushing them to form the desired shape — this takes a bit of getting used to, but you’ll get there, maybe.
Now, in a mixing bowl, combine the ingredients for the filling and smear them evenly all over your dough, leaving a 2.5cm gap around the edges of the dough.
Using your fingers, roll up the dough tightly from the edge nearest you, as evenly as you can muster. Take your time with this bit: it’s not a race. Relax and enjoy the roll. You’re rolling and nobody can stop you.
It’s empowering. Anyway, make sure you roll it quite tightly or your buns will all but completely unravel when they’re in the oven.
Once rolled, slice off the edges, because they’ll be lacking in filling, and cut your log into six even rolls. Smear some butter around the bottom and edges of a 23cm cake tin and carefully place your rolls into the tin, with five around the sides and one in the middle. The middle one will be the ultimate roll, and you mustn’t let anyone else eat that one. That is yours.
Cover the tin with the same tea towel as before and place it somewhere warm again, until they’ve yet again doubled in size (this will take at least 30 minutes). I realise there’s a lot of leaving-somewhere-warm-to-double-in-size going on here, but that’s just kinda the way it is.
Once they’ve doubled in size, they’re finally ready to go in the oven.
Preheat your oven to 150°C .
Bake the buns for 12–15 minutes. They’ll be golden brown on top, but check they’re cooked in the middle by carefully pulling the edge of one of the rolls away and inspecting the consistency of the dough. They should be light, fluffy, springy and dense. Like me, but less tasty.
I like to make the frosting now rather than in advance. I prefer to frost the buns when they’re slightly warm, but not hot, otherwise it melts everywhere and doesn’t look as good. To make the frosting you just need to combine all of the ingredients in the bowl of a stand mixer using the beater attachment. Beat on medium-high speed for 5 minutes or until the mixture is smooth and spreadable.
When the buns have cooled down but are still slightly warm to the touch, remove from the tin and cover the living daylights out of them with the frosting. Less is not more.
Break them apart, or serve as a tear-and-share sort of situation.
Alternatively, serve as a whole, and forget the share bit.
Cinnamon buns have a notoriously short shelf-life, and if you want to experience them at their best, you really need to eat them on the day they’re made. If you have to, you can store them in an airtight container at room temperature and eat the next day, but they won’t be quite the same. However, if you give them 10–15 seconds in the microwave to soften, they won’t be far off.
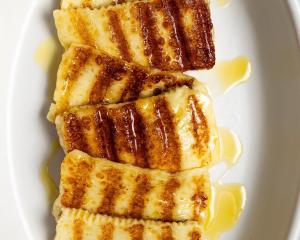
 Raspberry-glazed donut cookies
The cookie that catapulted us into viral stardom. Once outlawed due to the use of illegal sprinkles, now made possible once more thanks to our very own brand. Don’t scrimp on the sprinkles. Not now, not ever.
Makes 10 cookies
140g softened unsalted butter
110g caster (superfine) sugar
140g light brown sugar
1 tsp vanilla extract
1 egg
140g plain (all-purpose) flour, sifted
140g strong white bread flour, sifted
1 tsp baking powder
1 tsp bicarbonate of soda (baking soda)
1 tsp sea salt
For the raspberry donut glaze
200g icing (powdered) sugar
30g water
raspberry flavouring (use as instructed on packaging)
To finish
100g expensive sprinkles
Method
Cream the butter and sugars together in the bowl of a stand mixer fitted with the beater attachment until pale. Add the vanilla to your egg, and then add to the butter and sugar mixture. Mix for 1 minute, or until emulsified, then scrape down the base and sides of the bowl.
Weigh the flours, baking powder, bicarbonate of soda (baking soda) and salt and add to the bowl. Beat on the lowest speed until the mixture comes together.
Using an ice cream scoop, or your hands, scoop the mixture into 10 100g pucks and place on a greaseproof paper-lined tray. Cover the tray in cling film and put in the fridge for at least 24 hours (at most 72 hours). If you absolutely must bake the cookies on the same day, try to give them at least 6 hours to chill before baking.
When you’re ready to bake, heat your oven to 150°C . Split the pucks across two greaseproof paper-lined baking trays, leaving enough space between them to allow for spreading in the oven.
Bake for 12-15 minutes, or until they resemble cookies. If they’re still bulging in the centre, they’re not ready. Remove from the oven and leave to cool on the baking trays.
While your cookies are cooling, prepare the raspberry glaze by whisking the icing (powdered) sugar, water and raspberry flavouring in a small mixing bowl. Take your time, and mix thoroughly, to ensure that you do not end up with any clumps of unmixed icing sugar — biting into that is the worst thing ever. Well, not the worst thing ever, but it’s pretty annoying.
While the glaze is still wet and the cookies have cooled, use a pastry brush (or the back of a spoon if you’re ill prepared) to paint the glaze over your cookies. Adorn your donut-inspired cookies straight away with lots of sprinkles and set to one side to dry.
The cookies will keep for up to two days in an airtight container at room temperature, but are best eaten the day you make them.
 Speculoos pie
Nobody knows exactly how a little Belgian biscuit has managed to slowly take over the world over the past decade, but it’s impossible to refute the reality of the situation we have found ourselves in. They’re everywhere. Never mind artificial intelligence, it’s the caramelised biscuit you should be worried about.
Serves 10–14
For the caramelised biscuit crust
700g Lotus biscuits
5g sea salt
400g unsalted butter, cubed
For the caramel
600g caramel (see right)
1 tsp ground cinnamon
½ tsp ground nutmeg
For the Lotus Biscoff cream
450g Lotus Biscoff spread
400g double (heavy) cream
1 tsp vanilla extract
To finish
25g Lotus biscuits, crushed
Method
Blitz the Lotus biscuits and salt in a food processor to a fine crumb, then decant into a mixing bowl. Melt your butter in the microwave in a heatproof, microwave-safe container until it’s totally melted. About 1 minute 30 seconds should do it. Add the melted butter to your bowl of crumbs and mix thoroughly, ensuring even distribution of melted butter. Press the mixture into your 30cm pie tin straight away, while the mixture is still warm. If you leave it too long, the butter will set and it’ll become much less pliable. If you like, you can make this in advance, then just reheat the crumb in the microwave in short 15-second blasts.
Once you’ve lined your tin, bang it in the fridge to firm up. Ten minutes later it’s ready to fill. If you’re that way inclined, you can make your pie crust in advance and freeze it. It’ll be good in the freezer for up to a month and won’t lose any quality whatsoever.
Now get on with making the caramel. As soon as you take the caramel off the heat, stir in the cinnamon and nutmeg.
This is your spiced caramel. Let it cool at room temperature for up to 30 minutes before pouring into the biscuit crust, otherwise it’ll be so hot that it’ll melt the butter in the biscuits and you’ll have a real situation on your hands.
Melt 400g of the Lotus Biscoff spread in the microwave and pour it directly on to the caramel layer. You should do this while the caramel is still warm because it’ll help the spread stick to it. If the caramel is cold when you pour the melted spread over it, the layers won’t bond as well and the pie might come apart when you slice it.
When melted, the Biscoff spread should be pretty thin, but just in case it hasn’t covered the whole pie, use the back of a spoon to even it all out. Bang it in the fridge to set for at least 30 minutes.
Make Properly Whipped Cream using the double (heavy) cream and vanilla extract. Top the pie with the cream and melt the remaining 50g of Lotus Biscoff spread in the microwave. When melted, pour it all over the cream. There won’t be enough to cover the cream — it’ll just be a sort of Jackson Pollock splattering. Use an offset palette knife, or the back of a spoon, to smear the Biscoff spread into the cream, but don’t mix it in — you don’t want brown cream, you want cream-coloured cream with caramel-coloured swirls. It’s hard to explain. Work it out. Top the pie with the 25g of crushed Lotus biscuits for added crunch, as the textures of this pie are all pretty soft. There’s nothing wrong with soft though really — everybody likes a bit of soft from time to time.
Keep refrigerated and consume this pie within 3 days (although I really doubt it will last that long, because it’s absolutely delicious).
 Caramel
350g caster sugar
70g water
200g double (heavy) cream
90g unsalted butter, cubed
Put the sugar and water into a heavy-bottomed saucepan and stir the water into the sugar. Place over a medium heat and leave the sugar to dissolve. Do not stir, and
don’t be tempted to pick the pan up and mess around with it.
When the sugar has dissolved, the colour will start to change, starting off a pale yellow and eventually turning to a deep amber. The trick to good caramel is knowing how far to take the sugar. If you don’t get to the deep amber stage, and you add the cream and butter, your caramel will be underwhelming. If you take it too far, you’ll
burn the sugar and the caramel will be bitter and laden with bits of burnt sugar.
When your sugar is bubbling aggressively and has a deep amber colour, remove from the heat and carefully had the cream. Be very careful, because the cold cream is going to shock the caramel and cause it to bubble even more aggressively.
Immediately stir the cream into the sugar using a heatproof silicone spatula. Once the bubbling has settled down, add the butter and continue to stir until butter has
melted.
The mixture should now resemble caramel, but don’t taste it yet because it’ll be hotter than the sun. The mixture will be quite thin as it thickens as it cools. Leave
to cool at room temperature.
Once cooked you can store it in the fridge for up to one month or the freezer for up to three months.