

Sweet baking is Tilly Pamment’s love language.
"It is what I turn to for little pockets of joy; handfuls of sunshine, sticky with jam and vanilla; kind words and warm embraces in the form of sugar, butter and biscuit crumbs. It is messy and imperfect, but full of love."
So much so that the Australian food writer, photographer and stylist, who lives in the Blue Mountains, has written a book dedicated to "small, unfussy sweet bakes" - in other words, slices, biscuits, tarts, baby cakes, scones, buns and other bite-sized "beauties".
All are designed to be held in hands, shared with others or squirrelled away for another day.
"They are recipes I love to cook and eat, sometimes in lieu of dinner!"
The author of The Plain Cake Appreciation Society and mum of two, has included a section dedicated to pantry keepers and "postable love".
"I do this often - and love the thought of an unsuspecting friend or family member opening the door to a little box of sunshine left sitting on their doorstep."

Her suggestions are to look at how long they will keep and take that into consideration when looking at how long it will take it to arrive in the post; ensure you wrap and seal your bakes well in at least one airtight layer of food-safe cellophane or a plastic snap-lock bag, followed by bubble wrap or honeycomb paper; and then place them snugly in a box and pad with extra paper or bubble wrap.
"If you have the time and inclination, a little extra care when wrapping your baked goods - colourised tape and ribbon, or candles for a birthday box - can make all the difference."
Another chapter is dedicated to sugared scones, pikelets and sticky buns, which she describes as "my childhood in edible form".
"Soothing spiced bread, frying butter and dollops of jam and cream. Fresh, warm scones and carbohydrate-induced succour.
"When the weather sets in or my head is a little foggy, there is something particular I crave - yeasted dough. I want to meditatively mix and knead and watch patiently as the silky dough rises. I want to shape it, adding layers of sugar, spice and butter, and folk it into buns. Because a light, fluffy, sugary bun is the ultimate in restorative baking."
Other chapters are dedicated to slices - "home-made sunbeams and slices of joy" - biscuits, pastry, baby cakes and jam and baked fruit.
Note: These recipes use the Australian tablespoon measure of 20ml. Add an additional 1tsp if using a New Zealand 15ml tablespoon.
The book
Images and text from Handfuls of Sunshine by Tilly Pamment, photography by Tilly Pamment. Murdoch Books RRP $45.
 Sunken chocolate cheesecakes
Don’t let their somewhat underwhelming appearance fool you - these rich, intensely chocolatey, little cheesecakes really are heavenly!
Serve them at room temperature, when they are beautifully soft, with a spoonful of cream in their sunken little tops, or a smattering of sharp, fresh raspberries (or both!), and thank me later.
Creamy and decadent, they are just as a cheesecake ought to be.
Makes 12 little cakes
GF
Ingredients
500g cream cheese, at room temperature
250g dark chocolate (45-55% cocoa solids), melted
165g caster (superfine) sugar
⅛ teaspoon fine sea salt
3 tsp vanilla bean paste
4 eggs
200g sour cream
2 Tbsp (20g) Dutch-process (unsweetened) cocoa powder, plus extra to dust (optional)
1 Tbsp gluten-free cornflour (cornstarch)
Method
Preheat the oven to 210°C fan-forced and line two 6-hole large muffin tins (with 180ml capacity holes) with paper muffin wrappers. You need the tulip-shaped wrappers that extend up above the top of the tins (or make your own using squares of baking paper), as the cheesecakes will rise quite a bit while cooking.
Place the cream cheese in the bowl of a stand mixer with a paddle attachment and mix until smooth. Add the warm melted chocolate and mix on low speed until combined. Scrape down the side of the bowl and add the sugar, salt and vanilla, mixing again until smooth.
Add the eggs, one at a time, mixing well and scraping down the side of the bowl after each addition. In a separate bowl, mix the sour cream until smooth.
Sift in the cocoa and cornflour and mix again until smooth. Add this to the cream cheese and chocolate mixture and mix on low speed, scraping down the side of the bowl once or twice, until smooth. Strain the batter through a sieve into a large jug, discarding any lumps, then divide evenly among the prepared muffin cups.
Tap the tins gently on the bench a few times to remove any large air bubbles.
Bake in the preheated oven for 10-14 minutes or until the surfaces of the cakes are set and starting to crack, but they are still wobbly in the middle. They cook further as they cool, and its better to err on the side of undercooked rather than overcooked with such small cakes.
Allow the cakes to cool to room temperature in the tins before serving, or place in the fridge for a couple of hours or overnight to chill. Dust with extra cocoa just before serving, if you like.
Return to room temperature before serving if you like a creamy, soft cheesecake, or serve cold, straight from the fridge, if you prefer something a little more dense.
Store and share
These rich little cakes can be prepared the day before you want to serve them as they keep very happily in the fridge for a day or two.

Burnt butter oat bars
Ingredients
150g unsalted butter, cubed
1 Tbsp golden syrup (light treacle)
1 tsp vanilla bean paste
100g white spelt flour
½ tsp bicarbonate of soda (baking soda)
120g quick oats
60g desiccated coconut
110g golden (raw) caster (superfine) sugar
¼ tsp fine sea salt
180g chocolate of your choice, melted (optional)
Flaky sea salt, to sprinkle (optional)
Method
Line the base and sides of a 20 x 30cm slice or lamington tin with baking paper, leaving enough paper overhanging to lift the cooked slice out of the tin.
First, brown the butter by placing it in a saucepan over medium heat. Cook the butter, swirling the pan occasionally, until the butter has melted and starts to bubble rapidly. Once the bubbles slow and the butter starts to foam, watch carefully. When small brown flecks appear at the bottom of the pan, quickly remove from the heat. Stir in the golden syrup and vanilla, being careful as the butter might spit, and set aside to cool slightly.
While the butter is cooling, place the flour, bicarbonate of soda, oats, coconut, sugar and fine sea salt in a separate bowl, and use a hand whisk to combine. Pour in the warm browned butter mixture and use a wooden spoon or spatula to mix well. Tip the rubbly mixture into the base of your tin and press it out firmly into an even layer using an offset palette knife or the bottom of a glass. Place the tin in the fridge (or freezer if you have space), until firm.
While the base is chilling, preheat the oven to 150°C fan-forced.
When chilled, bake in the preheated oven for 20-25 minutes or until golden brown and smelling deliciously toasty.
Leave the slice to cool completely before using the extra baking paper to lift it out of the tin. Pour the melted chocolate over the top (if using), spreading it out evenly across the surface.
Sprinkle with a little sea salt, if you like. Allow the chocolate to set, then slice into bars using a large, hot, sharp knife.
Store and share
The oat bars will keep happily in an airtight container at room temperature for up to a week. If they are coated in chocolate and the weather is warm, store them in the fridge.
These oat bars travel very well and can even be posted (without the chocolate coating) as part of a care package.
 Strawberry and rhubarb jam Victoria sponges
I am a total sucker for just about any version of a Victoria sponge. Plain cake, jam and cream - what more could you want?
But make them little, individual Victorias and you really have my attention. The beauty of this recipe lies in its simplicity.
These little cakes are made with cream, not butter, in the batter, meaning you can mix them all in one bowl, by hand. And anything that gets me closer to a cake with less effort is a win in my book!
Filling them with whipped yoghurt-cream and home-made jam really does make them sing, but any good jam you are in possession of will do the trick!
Cakes
Unsalted butter, to grease
A little plain (all-purpose) flour, to dust
200ml thick (double) cream
165g caster (superfine) sugar
1 tsp vanilla bean paste
2 eggs
150g self-raising flour
⅛ tsp fine sea salt
To fill
200ml thickened (whipping) cream
100g Greek-style yoghurt
1 Tbsp icing (confectioners) sugar mixture, plus extra to dust
1 tsp rosewater
160g strawberry and rhubarb jam (see below)
Method
Preheat the oven to 160°C fan-forced and grease a 6-hole large muffin tin (with 180ml capacity holes) well with softened butter. I have a tin with straight-sided cups, which looks lovely, but a regular large muffin tin works just as well.
Dust the tin with a little plain flour, tapping out any excess. Make the cake batter by placing the cream, sugar and vanilla in a large mixing bowl and using a hand whisk to combine. Do not over-mix or the cream will become too stiff.
Add the eggs, one at a time, whisking after each addition. Add the self-raising flour and salt to the bowl, and whisk briefly to form a smooth batter.
Divide the batter evenly between the prepared tins, smoothing the tops with a spatula and tapping the tins gently on the bench to remove any air bubbles. Bake in the preheated oven for 15-20 minutes or until the cakes have risen and are cooked through. Allow the cakes to cool in their tins for 10 minutes before carefully turning them out on to a wire rack to cool completely.
When ready to assemble the cakes, make the filling by whipping the cream, yoghurt, sugar and rosewater to soft peaks. Split the cakes in half, and top the bottom halves with a generous scoop of the cream mixture. Use the back of a spoon to create a little nest in the cream, then place a spoonful of jam on top. Gently sandwich the tops of the cakes on and dust liberally with icing sugar.
Store and share
These cakes are best served soon after assembling.
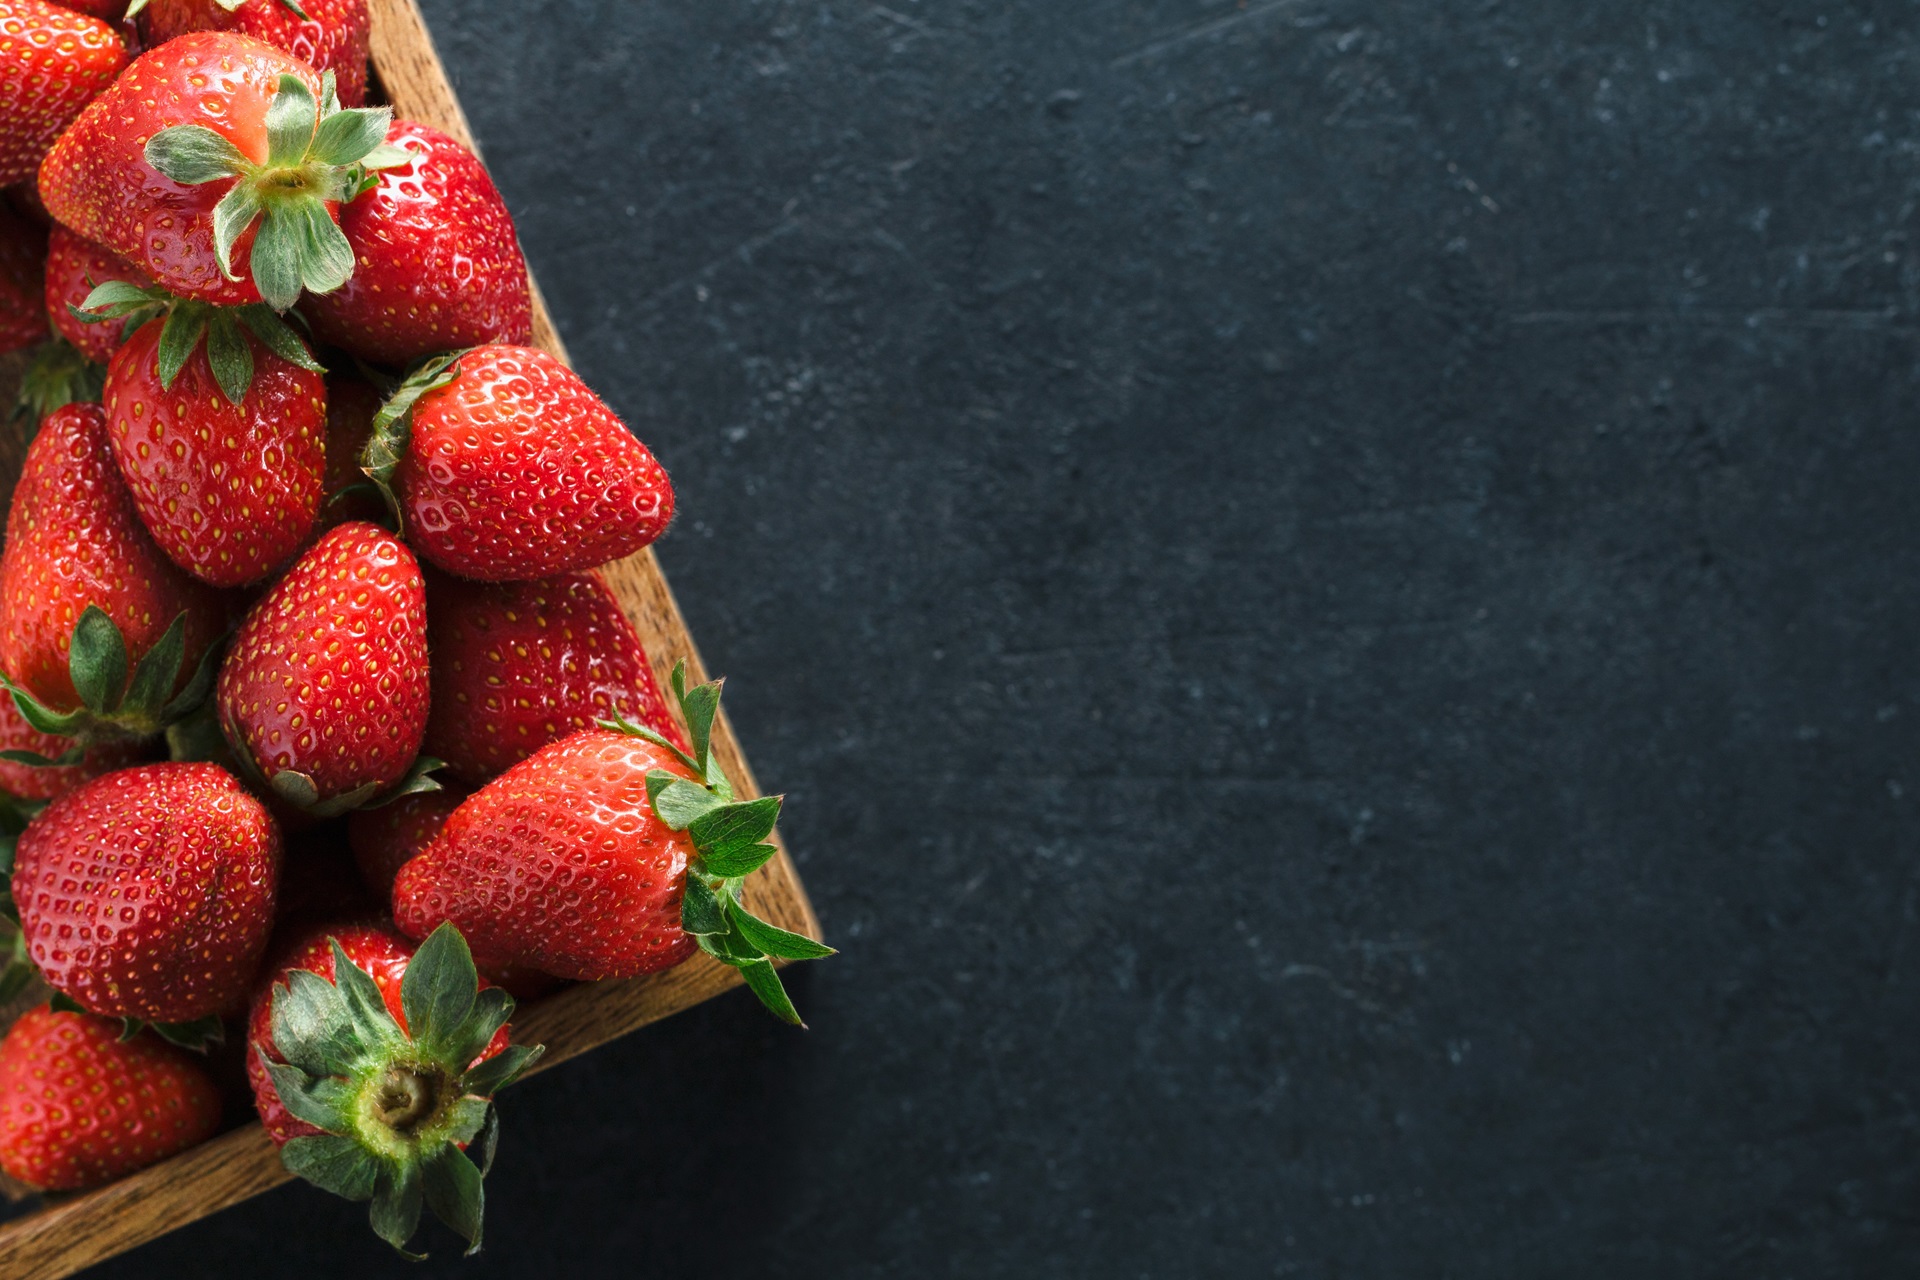
Strawberry and rhubarb jam
Ingredients
500g strawberries, hulled and quartered
300g rhubarb, cut into 2 cm pieces
440g caster (superfine) sugar
125ml lemon juice (about 3-4 lemons)
1 vanilla bean, split and seeds scraped or 1 Tbsp vanilla bean paste
2 tsp rosewater (optional)
Method
Preheat the oven to 180°C fan-forced. Place the strawberries, rhubarb, sugar, lemon juice and vanilla bean seeds and pod (or paste) in a large deep baking tray and mix well, making sure no dry bits of sugar remain.
Spread out the fruit into an even layer and place the tray in the preheated oven to cook for 20 minutes, or until the fruit is bubbling around the edges of the tray.
Carefully take the tray out of the oven and mash the fruit with a potato masher or fork. Return the tray to the oven and cook for a further 15-20 minutes.
Watch the jam carefully at this point as it can bubble over if it is cooked for too long. When the jam has reduced slightly and is bubbling and fragrant, carefully remove the tray from the oven.
Give the jam another little mash, stir in the rosewater (if using), then ladle it into a sterilised jar and seal while hot.
Store and share
Unopened jam will keep for up to 3 months in a cool place. Once opened, store in the refrigerator and use within a month.


