

The Australian author, cake designer and recipe creator, who won the 2020 MasterChef Back to Win series, comes back to cake because it is familiar, but never boring.
“It reduces stress, restores rhythm, ignites memories. It feels like my baking home, the place my passion was first born.’’
She found that passion in London where she started her own cake business, after her first attempt at MasterChef, but it took a few years before she realised cakes were what she was searching for.
MasterChef gave her the “unexpected kind of cakey success’’, an opportunity to launch her own financier packet mix.
“It might seem like a small thing, but to see people baking my product in their own kitchens? That was a full circle moment.’’
She has since written two baking books, her first “a love letter to baking itself’’, the second a deep dive in cookies.
As each were published, Jackson also had her two children.

“Apples, plums and morello cherries will always remind me of my baba, her pantry lined with jars that were just the right kind of sour sweet. Chocolate and hazelnut takes me straight back to Mum’s kitchen, where I’d sneak spoonfulls of Nutella when no-one was looking.’’
But alongside that are cakes that show her evolution as a baker such as her Pandan and coconut roll.
“Cake is so much more than just cake. It’s the taste of nostalgia, of comfort, of home.’’
She also includes plenty of tips and tricks about ingredients, methods and equipment.
So if you are looking for a sweet treat to bake for mum this Mother’s Day, there is plenty of inspiration in this book that will be welcomed.
The book
You Had Me at Cake, Emelia Jackson, photography by Armelle Habib, published by Murdoch Books, RRP $45.
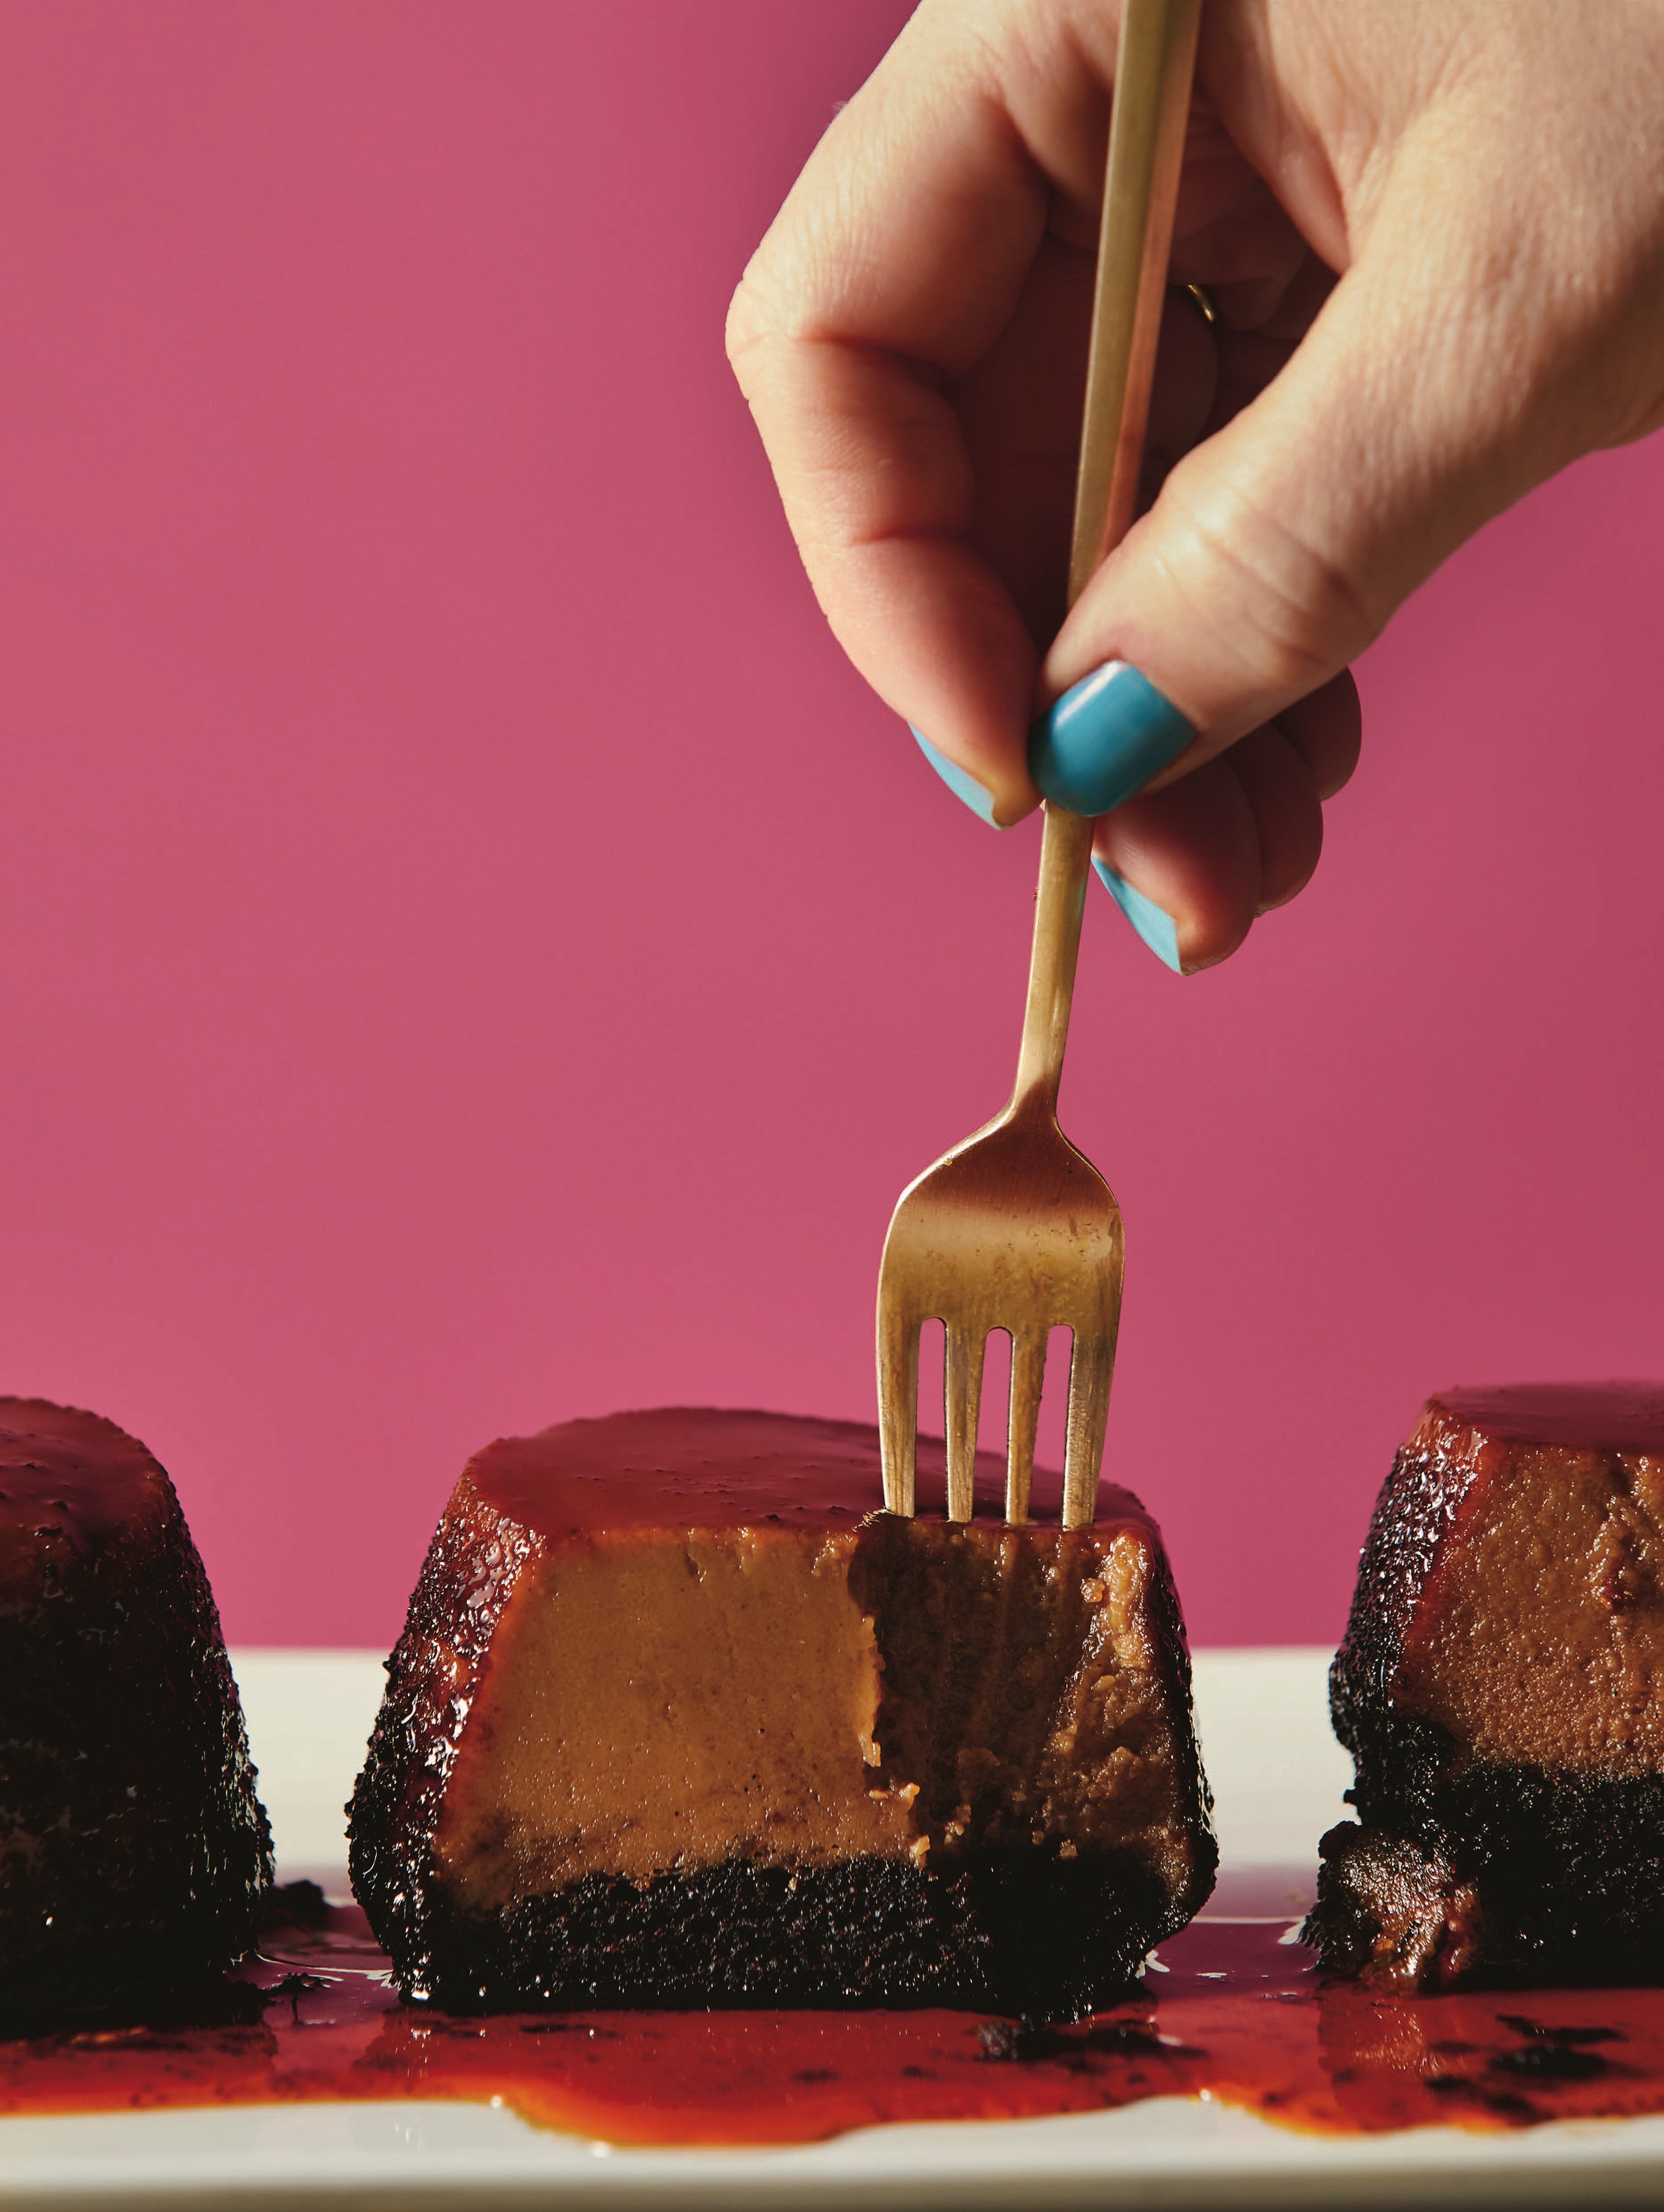
Vietnamese coffee flan cake — that magic one
I've seen this traditionally Mexican flan cake hybrid many times over the years, and it has always piqued my interest.
Traditionally, it’s made with a chocolate cake base and a flan top. However, whenever I see the word flan, Vietnamese iced coffee immediately springs to mind.
Why? Well, for one thing, my brain is a magical place. But probably more relevantly, sweetened condensed milk = Vietnamese iced coffee = flan. I hope you enjoyed my flow chart.
The magic of this one is that the flan is poured on top of the cake layer, then sinks to the bottom during the baking process. If you want to make the authentic version of this, just leave the coffee out.
Makes 8
Ingredients
Oil spray, for greasing
Caramel layer
180g caster (superfine) sugar
Chocolate cake
90g plain (all-purpose) flour
¼ tsp salt
½ tsp baking powder
½ tsp bicarbonate of soda (baking soda)
40g cocoa powder
50g unsalted butter, melted
45ml neutral-flavoured oil
140g caster (superfine) sugar
1 tsp vanilla bean paste
1 egg
40ml full-cream milk
100ml hot coffee
Coffee flan
4 eggs
120ml thickened (whipping) cream
500g sweetened condensed milk
3 shots espresso (or 1 tablespoon instant coffee powder)
1 tsp vanilla bean paste
4 tsp plain (all-purpose) flour
Method
Preheat the oven to 160°C fan-forced. Spray 8 x 180ml mini-pudding moulds with oil.
This is a three-part recipe, so let’s work in steps!
Step 1: The caramel
Place the sugar in a saucepan over medium heat. Stir constantly, until deeply caramelised, then add 75ml water (be careful it will splatter!). Cook, until the sugar melts into the water, then remove from the heat.
Pour around 2 Tbsp of the caramel into the base of each pudding mould and put them in the freezer while you make the cake batter.
Step 2: The cake
Combine the flour, salt, baking powder, bicarbonate of soda and cocoa in a bowl and whisk to combine.
In a separate bowl, combine the melted butter, oil and sugar. Add the vanilla and egg, mixing until well combined.
Fold the dry ingredients through the butter mixture, then add the milk and coffee.
Place a small cookie scoop (about 50-60g) of the chocolate cake mixture on top of the frozen caramel layer. Smooth this out to an even layer, then set aside.
Step 3: The coffee flan
For the flan, combine all of the ingredients in a jug and whisk until smooth. (I like to use a stick blender for this, but a hand whisk is also fine.)
Slowly (slowly!) pour the flan mixture over the top of the chocolate cake batter, filling each mould three-quarters to the top.
Transfer the mini-pudding moulds to a roasting dish, then half-fill the dish with boiling water.
Cover the dish with foil and bake for 22-25 minutes, or until the cake layer is completely baked (you can test this with a skewer).
Remove the moulds from the roasting tin and allow the cakes to sit at room temperature for 30 minutes before placing in the fridge to cool completely (for at least an hour).
To demould these cakes, I like to fill a bowl with boiling water and dip each pudding mould into it, this will loosen the flan from the moulds. Invert on to a serving plate to reveal the magic!
Drizzle with extra caramel from the moulds, if you like.

Peach crumble sheet cake
I’m going to let you in on a secret here: I’ve never eaten a fresh peach. I can’t even look at them. That furry, velvety skin? Absolutely not for me. Just the thought of biting into one sends my entire body into sensory overload.
Don’t get me wrong, I know I’m missing out; I can imagine that a fresh, juicy, ripe peach is something akin to perfection.
But this classic sheet cake fills some of that void. It has a beautiful buttery base studded with juicy, just-collapsed peaches and topped with a crumbly, crunchy streusel. A classic, for good reason.
You can absolutely use fresh peaches here, just make sure they are juicy and ripe. And if you’re not a fan of peaches, any other stone fruit will work.
Makes 12 squares
Ingredients
250g plain (all-purpose) or cake flour
1½ tsp baking powder
½ tsp bicarbonate of soda (baking soda)
1 tsp salt
170g unsalted butter, softened
180g caster (superfine) sugar
2 eggs
2 tsp vanilla bean paste
120g sour cream or Greek-style yoghurt
410g tin peach halves, drained and cut in half lengthways (reserve the juice for the glaze)
Streusel topping
100g plain (all-purpose) flour
75g light brown sugar
1 tsp ground cinnamon
½ tsp salt
85g unsalted butter, softened
Glaze
100g icing (confectioners) sugar
1-2 Tbsp full-cream milk (or the juice from tinned peaches, if using)
½ tsp vanilla bean paste
Method
For the streusel topping, combine all of the ingredients in a bowl. Using your fingers, rub the butter into the dry ingredients until a loose crumb forms and there are no obvious pieces of butter remaining. Set aside.
Preheat the oven to 160°C fan-forced. Line a 23 × 33cm baking tin with baking paper.
Put the flour, baking powder, bicarb and salt in a bowl and whisk to combine and break down any lumps. In the bowl of an electric mixer fitted with the paddle attachment, cream the butter and caster sugar for 2-3 minutes or until the butter has lightened in colour. Add the eggs, one at a time, mixing well after each addition, before adding in the vanilla.
Add the dry ingredients to the butter mixture and mix until just combined. Finally, fold through the sour cream or yoghurt.
Spread the mixture into the baking tin, then stud it with the peaches. Top with the streusel and bake for 35-40 minutes or until a skewer inserted into the centre comes out clean. Allow the cake to cool in the tin for 10 minutes before transferring to a wire rack to cool completely.
To make the glaze, put all of the ingredients in a bowl and whisk to combine. The mixture should have the consistency of thickened cream.
Use a fork or spoon to drizzle the glaze all over the cooled cake. Allow the glaze to set for 30 minutes before cutting the cake into 12 squares.

Gingerbread bundt cake with caramel
This is a ginger-heavy, deeply treacly, dark and dense gingerbread cake.
With its tight and buttery crumb structure, the texture closely resembles a pound cake.
The heavy spice mixture pairs beautifully with the sweetness of the caramel drip over the top.
This is a great little winter cake, bold and intensely flavoured.
Makes a 24cm bundt cake
Ingredients
Oil spray, for greasing
Caramel
125g caster (superfine) sugar
75ml thickened (whipping) cream
30g unsalted butter, cubed
Pinch of salt
Gingerbread cake
120g unsalted butter, softened
120g brown sugar
100g caster (superfine) sugar
45g molasses or treacle
1 tsp vanilla extract or paste
2 eggs
235g plain (all-purpose) flour
2 tsp ground ginger
2 tsp ground cinnamon
¼ tsp ground nutmeg
½ tsp baking powder
½ tsp bicarbonate of soda (baking soda)
180ml buttermilk
Method
For the caramel, cook the sugar in a saucepan over medium heat until the edges begin to turn amber. As we are not adding water to the sugar, there is no risk of it crystallising, so you can stir as needed in order to achieve an evenly burnished golden brown. Continue to cook the sugar until it is an even, deeply golden colour.
Add the cream and butter – be careful as it will splatter – and cook until the sugar has dissolved into the cream to make a smooth caramel sauce. Stir in the salt and set aside in a heatproof container to cool while you bake the cake.
Preheat the oven to 150°C fan-forced and generously spray a 24cm bundt tin with oil.
Using an electric mixer fitted with the paddle attachment, combine the butter, sugars, molasses or treacle and vanilla. Mix on medium speed for 3-4 minutes, or until pale and fluffy, before adding the eggs, one at a time, and mixing until completely combined.
Sift the flour, spices, baking powder and bicarbonate of soda over the egg mixture and mix until just combined. Finally, mix through the buttermilk. Pour the batter into the bundt tin and use an offset spatula to spread it out into an even layer.
Bake for 55-60 minutes or until a skewer inserted into the centre of the cake comes out clean.
Allow the cake to cool in the tin for 10 minutes before turning it out on to a wire rack to cool completely.
Transfer to a serving plate and pour over the caramel sauce before serving.


