
"The heartbeat of the city is its taquerias, food vendors, markets and taco carts, where people from all walks of life come together."
Perhaps the most important food lesson you learn in Mexico is that street food is not fast food. People labour for hours over marinating, cooking and basting meats for taco fillings. Many hours are spent stuffing corn husks with masa and fillings and then folding them to make tamales.
"This involves passion, knowledge and skill. Mexican food is zesty and fun to eat."
Guevara Munoz, who trained and worked as a marine biologist, says the cuisine has a rich and diverse history, with influences from all over the world from the Middle East to France, Central America and of course Spain.

"I believe Mexican food is one of the most misunderstood cuisines in the world."
Her book Provecho, meaning "enjoy your meal", is aimed at providing people who love authentic Mexican food — no Tex-Mex or Oz Mex — recipes to make at home.
She includes chapters on Mexican cookware and ingredients to help get you started before breaking up the book into meal times plus sections on snacks and starters, tacos and tostadas, drinks and sweets.
The book
Images and text from Provecho: Real Mexican Food at Home by Daniella Guevara Munoz, photography by Simon Bajada. Murdoch Books; RRP $49.99
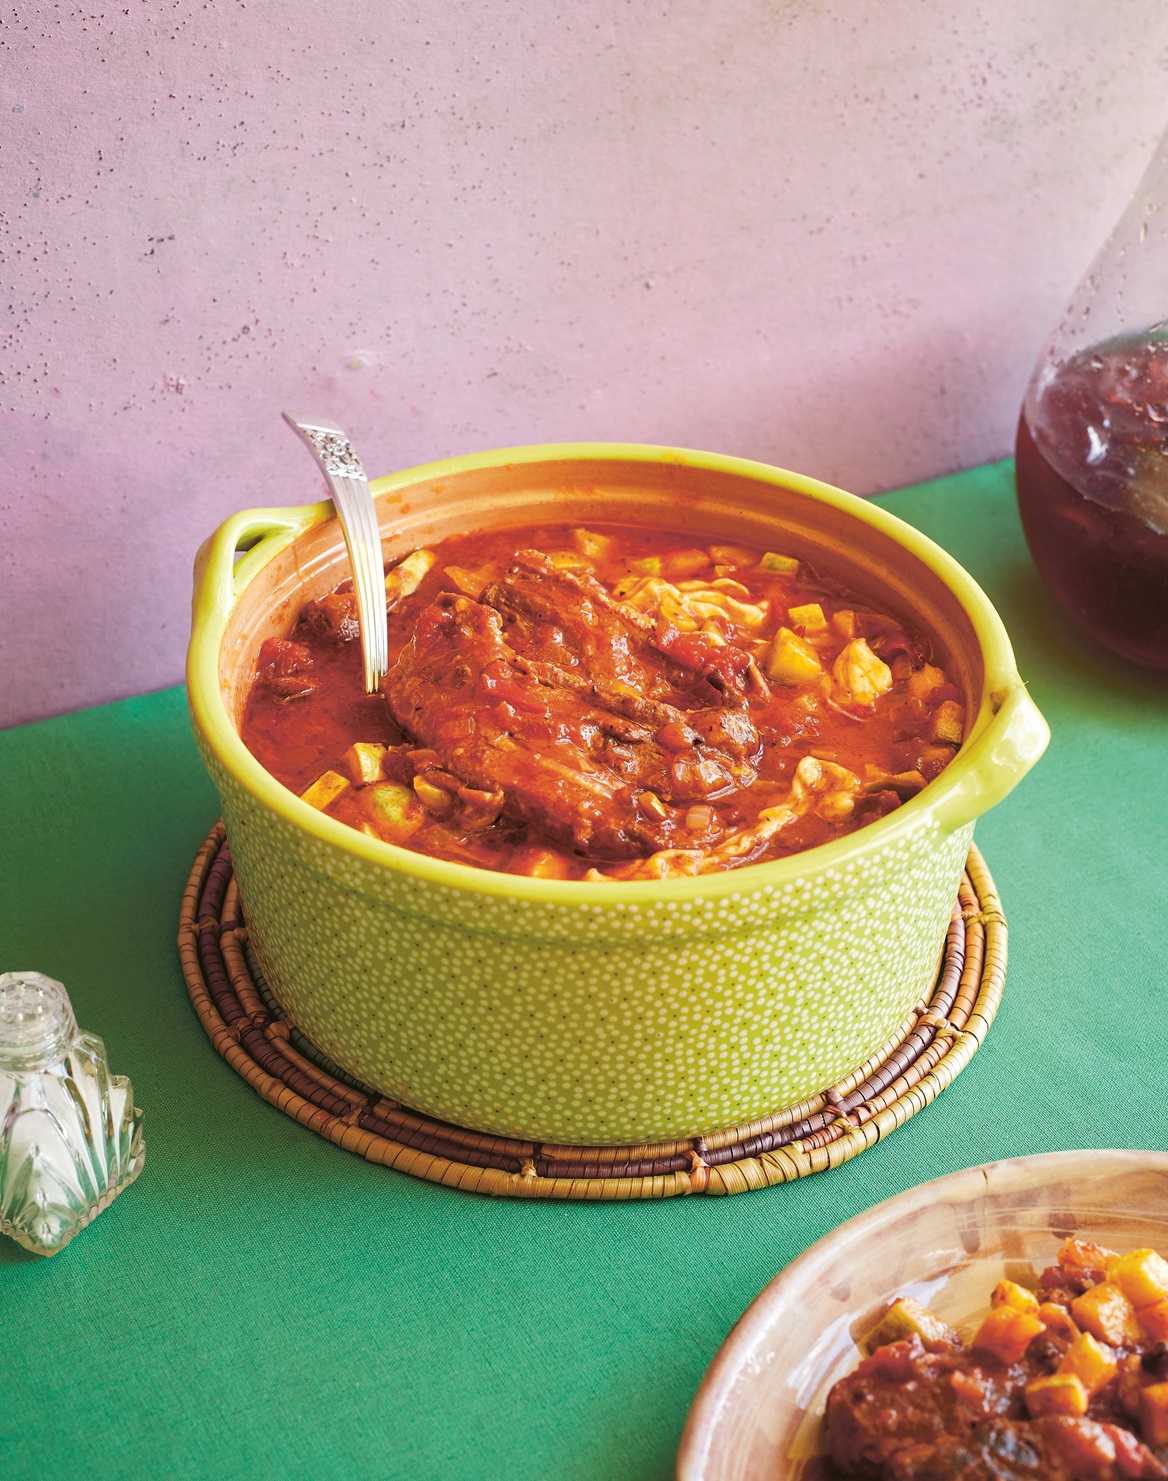 Pork with zucchini
This is a dish that many Mexicans associate with family and growing up — at least I do. This is my favourite recipe from my mother; she makes it exceptionally well and uses pork ribs. Ask your butcher to cut the ribs into 5cm chunks — you want the ribs to be meaty and not too fat. You can make this dish a day in advance and reheat it just before serving. Perfect for a taquiza.
Serves 6
Ingredients
1kg pork ribs, cut into 5cm chunks
2 garlic cloves
3 tsp table salt
1 small brown onion, diced
600g tomatoes, finely diced
400g zucchini (courgettes), diced
To serve
White rice

Method
Add the pork, 500ml (2 cups) of water, the garlic and 1 teaspoon of the salt to a large cast-iron pan over medium heat. Bring to a gentle boil and cook for about 1 hour, or until the water evaporates and the meat starts to fry in its own fat. Fry until the meat is golden brown. Turn off the heat. Remove the pork from the pan retaining the fat in the pan and set aside in a bowl. In the same pan with the rendered fat, fry the onion until translucent. Add the tomato and zucchini and cook for 3-4 minutes. Season with the remaining salt and return the meat to the pan. Cook for another 10 minutes. Serve carne de puerco con calabacitas with white rice and a stack of corn tortillas.
White rice
50ml vegetable oil
400g (2 cups) jasmine rice
660ml chicken stock or vegetable stock
1 tsp table salt
40g (¼ cup) diced carrot
50g (⅓ cup) frozen peas
Method
Heat the oil in a medium saucepan over medium-high heat. Add the rice and fry slowly, stirring frequently, until the rice turns pale and lightly golden, about 5-10 minutes. Mix the stock together with the salt, carrot and peas. Set aside.
In the process of frying, the rice’s texture will change. It will be hard to move around at first, but when the rice has reached the right point it will have the texture of sand and will be easy to stir. At this point, add the stock mixture and cook, uncovered, until it boils. Reduce the heat to low, cover the saucepan with a lid and continue cooking for 8 minutes. The broth should be absorbed by the rice now, and little air holes should appear on the surface. Remove from the heat and let stand, covered, for at least another 10 minutes. Serve as a side. Leftovers can be kept in the fridge for 3-4 days. Simply reheat in a small saucepan over low heat.
 Mexican prawn cocktail
Once you’ve tried this Mexican prawn (shrimp) cocktail, which is enjoyed all over Mexico, you won’t go back to the creamy seafood sauce-dunked prawn cocktails of years gone by! You can add oysters, clams or cooked octopus to make it a true seafood cocktail. It’s a perfect hangover cure as well. The only other thing you need is some Salada crackers (original only!) and you’re set.
Serves 4
Ingredients
½ brown onion, roughly chopped
3 garlic cloves
1 small thyme sprig
1 tsp table salt
1 bay leaf
750g small/medium raw whole prawns (shrimp), unpeeled
1 small white onion, finely chopped
2 tomatoes, deseeded and finely diced
¼ bunch coriander (cilantro), chopped, plus extra leaves to garnish
1 avocado, diced (optional)
8 large Salada (Original) crackers (or other saltine-style crackers)
2 limes, cut into wedges
Sauce
250ml (1 cup) tomato juice
125ml (½ cup) tomato tomato sauce
125ml (½ cup) freshly squeezed orange juice
60ml (¼ cup) freshly squeezed lime juice (from 2 limes)
110ml of the prawn cooking broth (see method)
1 Tbsp olive oil
hot sauce, such as 1 Tbsp Tabasco or 1 tsp habanero hot sauce (see below for home-made), plus extra to garnish
salt, to taste
freshly ground black pepper, to taste
Method
Fill a medium saucepan over medium-low heat with 1.5 litres (6 cups) of water. Add the brown onion, garlic, thyme, salt and bay leaf and bring to the boil. Add the prawns and cook for 3 minutes. Take the prawns out of the saucepan with a mesh strainer, reserving the broth in the pan as you will need it later.
Set aside. Let the prawns cool, then peel and de-vein, reserving the shells. Place the prawn shells into the reserved broth, bring to the boil again and cook for another 10 minutes before turning the heat off and letting it cool. Strain the broth and reserve.
For the sauce, in a bowl, whisk together the tomato juice, tomato sauce, orange juice, lime juice, reserved prawn broth, olive oil and hot sauce until well combined. Add salt and pepper to taste. Fill four cups or bowls with three layers of prawn, white onion, tomato and a little coriander. Pour the sauce over but don’t fully cover the prawns.
Garnish with diced avocado (if using) and extra coriander leaves. Add the hot sauce. Place the cups on small plates and serve each portion with two whole Salada crackers and lime wedges.
Habanero hot sauce
100g red habaneros
2 Tbsp freshly squeezed orange juice
50ml white vinegar
1 tsp table salt
Method
Preheat a comal, hotplate or heavy-based frying pan to medium heat (you can also use a barbecue).
Place the habaneros on the hotplate or in the frying pan (no oil!) and let the chillies char, turning them until they are half-blackened and soft. This will take about 10 minutes, but keep checking and take them out as soon as they are ready. Remove the stems and place the chillies in a food processor or blender with the rest of the ingredients. Close the lid and blend until the sauce is smooth. Depending on your preference, you can keep it thick to use as a paste or add some water to make it runny.
Place in a small bowl or sauce bottle. It will keep for a couple of weeks in the fridge.
For long-term storage (12-18 months), jar or bottle the sauce in sterilised containers and pasteurise it by placing the capped bottles or jars in a saucepan with cold water, fully submerged, then boiling for 30 minutes.
Tip: To sterilise jars, wash them and their lids in the dishwasher on the hottest cycle.
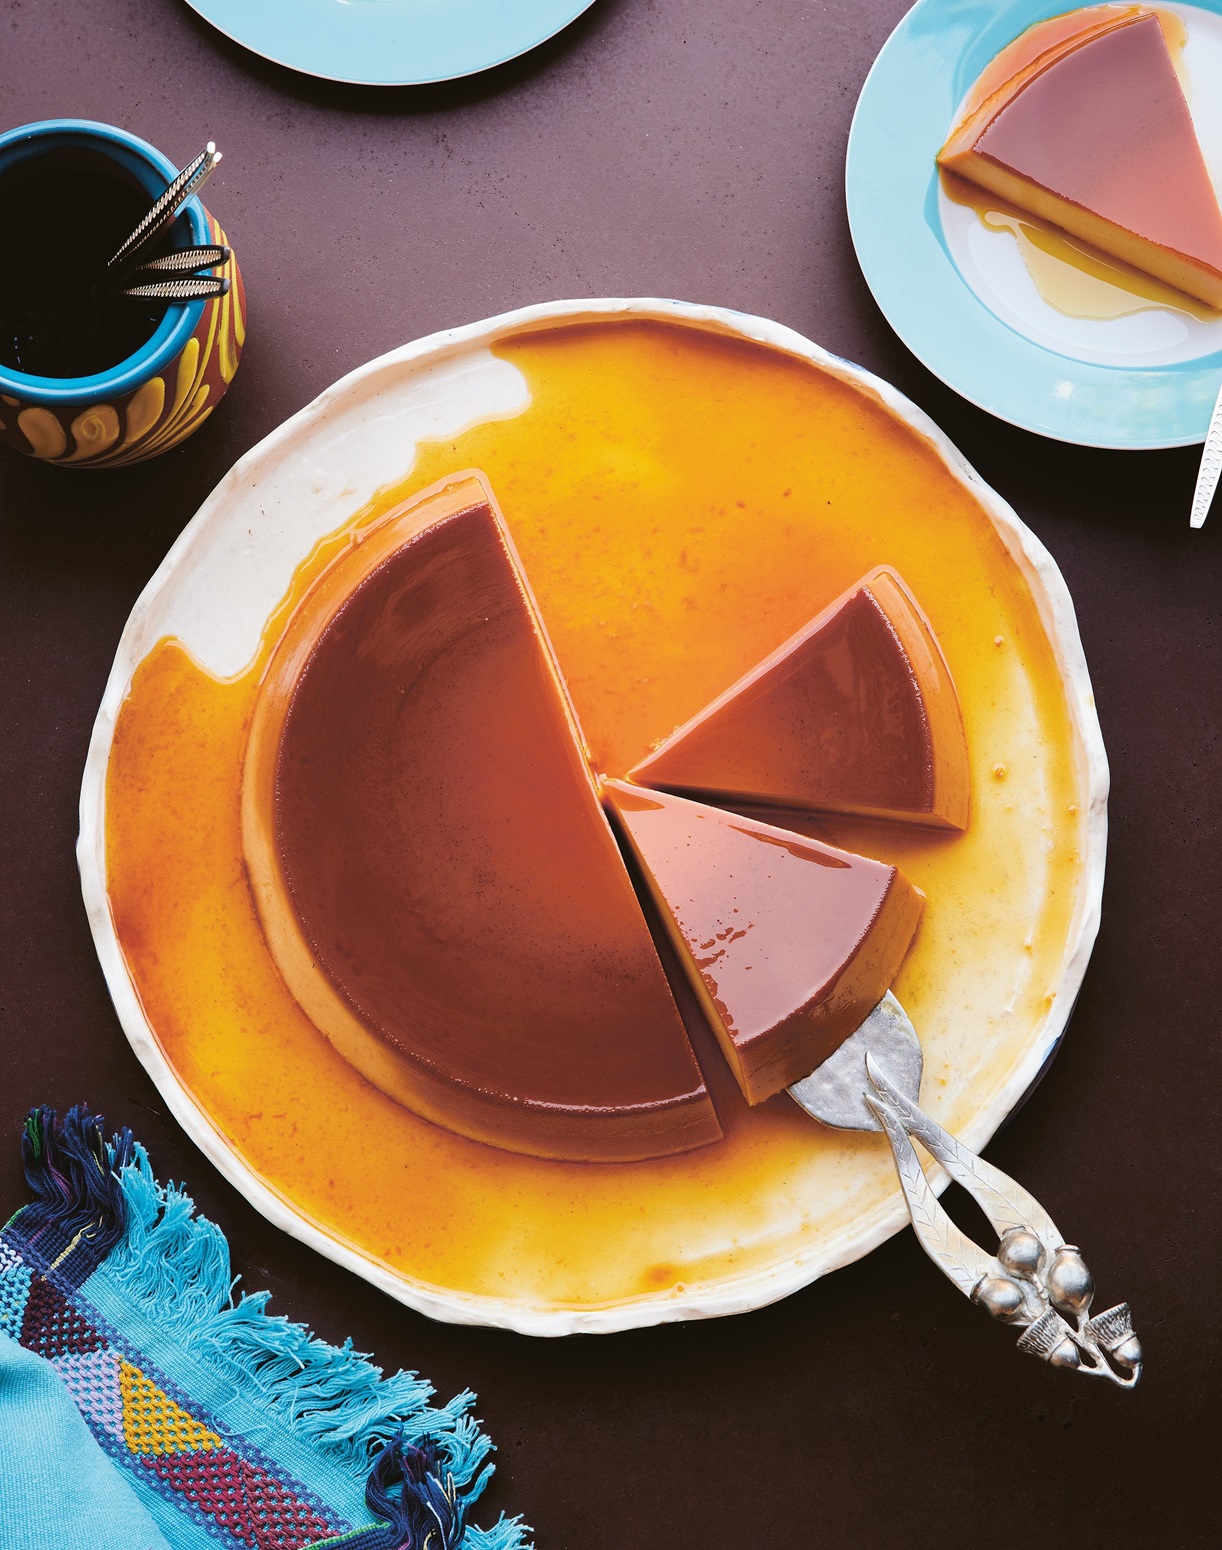 Cheese flan
This is a deliciously rich dessert that your friends will not only thank you for but will forever request you make! I get complaints every time I take it off the menu at La Popular Taqueria, so be careful who you choose to serve this to, as you might be stuck on flan duties for a very long time! In Mexico, a flan is typically served at a fonda or a casual diner, usually as part of the economical menu the comida corrida.
Serves 8-12
Ingredients
150g caster (superfine) sugar
250g cream cheese, at room temperature
340ml tinned evaporated milk
400ml tinned condensed milk
5 eggs, at room temperature
seeds scraped from ½ vanilla bean, or
½ tsp vanilla bean paste
½ tsp ground cinnamon
½ tsp table salt
Method
I generally use a round Pyrex pie dish (24cm in diameter) as a mould. It is transparent and makes coating with burnt sugar easier. You will also need a roasting tin that the mould fits inside, in order to create a bain-marie.
Preheat the oven to 180°C. Place the sugar and 80ml (⅓ cup) of water in a heavy-based saucepan over medium-high heat. Bring to the boil and cook the sugar until it starts to change colour. Reduce the heat to medium-low and keep cooking until the sugar is light brown to brown; this can take 10-15 minutes. Be careful — the sugar will be about 180°C, and you can burn yourself. You have to be careful not to burn the sugar, so stay vigilant. When the sugar starts smoking, it’s ready. Have a couple of oven mitts ready and your mould on a flat and secure surface. When the sugar is ready, quickly pour it into the mould and, with oven mitts on, distribute the caramel over the bottom and two-thirds of the way up the side of the mould. The caramel will dissolve into syrup when the flan is ready and will make unmoulding easy. Set the mould aside.
Boil 1.5 litres (6 cups) of water in a kettle. Add all the remaining ingredients to a blender. Blend on the lowest speed for 1 minute, until the mixture is smooth but not too frothy. Pour it into the mould and cover with foil. Place the mould in the roasting tin. Place the tin with the mould inside on a middle shelf in the oven, then pour the hot water into the tray until it reaches two-thirds of the way up the outside of the mould. Cook for 1 hour.
When ready, with your mitts on, take the tin filled with water and the mould out of the oven and check if the flan is cooked. Jiggle the mould softly — it should be wobbly. If the middle is still runny, return to the oven for another 10 minutes. Take the mould out of the tin and place on a wire rack to cool — note that the flan is very fragile at this stage. When cool, run a paring knife around the edge of the flan, which will make unmoulding easier later, then place in the fridge.
To unmould the flan, you need a plate that is larger than the mould, preferably with a raised edge. Place the plate upside down on top of the mould. Holding both the plate and mould very securely, flip them both upside down so the flan lands on the plate. Do not wear your Sunday best at this stage, as you might splash it with flan goodness! Collect the syrup from the mould and place it in a little jug. With a long, thin knife, cut the flan into slices. Clean the knife between cuts so it keeps the flan pretty.
Serve the slices on dessert plates and finish with a drizzle of syrup.
Corn tortillas
Ingredients
280g masa harina (nixtamalised maize flour)
¼ tsp table salt (optional)
about 375ml (1½ cups) warm water
Method
In a mixing bowl, combine the masa harina and salt (if using). Gradually add the warm water while stirring with your hands. Continue to add water until the dough comes together and becomes soft and pliable. The dough should hold together but not be overly sticky. If it feels too dry, add a little more water. If it’s too wet, add a bit more masa harina.
Knead the dough for about 10 minutes to get the best result. It should be smooth and well combined. It must have a Play-Doh like consistency, quite soft and a little bit sticky. A good test is to make a tortilla in a press between two sheets of thin sandwich-bag plastic. If the edge of the tortilla has deep cracks, the masa is too dry. A rough edge is normal.
You can keep masa for a couple of days in the fridge in an airtight container.
If you want to use it, take it out of the fridge about an hour beforeahand.
Knead thoroughly with your hand and add some water if necessary.
Divide the masa into small balls (about 30g), slightly smaller than a golf ball.
You can make them larger or smaller depending on your preference. Preheat a comal, hotplate or non-stick frying pan over medium high heat. Place a ball of masa between two sheets of sandwich-bag plastic in the tortilla press. Press down firmly to flatten it into a round tortilla shape. Rotate the flattened tortilla with the plastic sheets 180° then press again gently. The tortilla should be about 12mm thick. Carefully peel off one of the plastic sheets, then place the raw tortilla (with the plastic) on the palm of your hand. The tortilla should be half on your hand, half hanging freely. Peel off the second sheet of plastic. Lay the tortilla on the preheated hotplate or in the pan by placing the freely hanging tortilla on the hotplate first, then letting the rest of the tortilla roll off your hands. You should come in with your hand, palm facing up, at an angle of about 45°. Once the tortilla has hit the hotplate, rotate your hands about 90°, rotating your palm towards the hotplate, pulling away from the tortilla.
This movement, if done smoothly, should release the tortilla from your palm without the tortilla falling on itself. This is a tricky movement and I suggest practising this on the bench first (no heat).
Cook for about 30-60 seconds until the edge curls up slightly. Flip with a spatula and cook the other side for about 60 seconds, then flip again if all goes well, it will puff up on the last flip (tip: don’t try to fix a wrongly placed fresh tortilla; it will get worse.)
Remove the cooked tortilla from the hotplate and stack it with the others in a clean tea (dish) towel in a chiquihuite.
The stacking is important, as it will keep cooking the tortilla.
Serve the freshly made corn tortillas warm to make your tacos.