Well the The Great New Zealand Birthday Cake Book has something special to celebrate with - the scarfie's beanie.
Yes, a chocolate cake created by baker and patissier Dean Brettschneider and decorated by graphic designer Jazmine Nixon to resemble every student's essential piece of clothing - a beanie.
It is just one of 80 cakes created by the pair for the book, which features designs ranging from bears, boats and ballerinas to pigs, pirates and princesses.
But it was the children from room 10 at Churchill Park School, Auckland, who came up with the names for the cakes, thinking up gems such as ''Swan Lake & The Dancing Tutus'' and ''Spike the Sprinkly Kiwi''.
While some recipes might appear a bit intimidating, there are plenty of handy tips, practical instructions on how to ice and even templates tucked in the back of the book to help bakers get the dimensions and the designs right.
The book is the third in the ''Great New Zealand'' series, joining the award-winning The Great New Zealand Cookbook and The Great New Zealand Baking Book.
 Photos supplied.
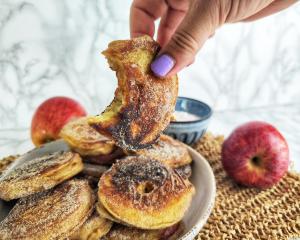
Scarfie's beanie
Photos supplied.
Scarfie's beanie
For 1 Dolly Varden chocolate cake
Dolly Varden cake tin
320ml milk
1½ tsp cream of tartar
160ml oil
200g (about 4 eggs) eggs, lightly beaten
2 tsp vanilla extract
360g plain flour
140g cocoa
580g caster sugar
2 tsp baking soda
1 tsp baking powder
200ml hot water
For buttercream
500g butter, softened and at room temperature
1.4kg icing sugar
4 Tbsp milk at room temperature
To decorate the cake
food colouring: black, blue, red and yellow
30g fondant (any colour and about the size of a golf ball)
1 Tbsp cocoa powder (for khaki buttercream)
4 piping bags
4 petal tips (Wilton 104)
1 palette knife
1 basket-weave tip (Wilton 47)
1 grass tip (Wilton 233)
1 skewer
Method
1. Bake the cake at least a day before you plan to decorate it.
Preheat the oven to 180degC on standard bake (160degC on fan bake, but avoid using fan bake as it causes excessive peaking during baking). Prepare cake tin by spraying liberally with oil spray.
Place milk and cream of tartar in a small glass, stir and set aside for 5 minutes. In a small bowl, place oil, eggs and vanilla extract, and stir to combine.
Into a large mixing bowl, sift flour, cocoa, caster sugar, baking soda and baking powder.
Scrape all of the milk mixture into the egg mixture and stir, then add the wet ingredients to the dry ingredients. Using a hand mixer, mix to combine, then slowly add hot water and mix well until you have a smooth batter.
Pour the mixture into the prepared tin and bake for approximately 1 hour 20 minutes. Check the cake regularly during the last quarter of cooking time, or until a cake skewer comes out clean when inserted into the cake.
Cool for 15 minutes in the tin, then remove and cool completely on a wire rack.
Once fully cool, wrap the cake in plastic wrap or place it in an airtight container if you plan to decorate it the following day, or wrap it in tinfoil, followed by plastic wrap and then freeze it.
2. Make the buttercream.
Beat butter in an electric mixer, using a paddle attachment, until the butter lightens in colour. Slowly add icing sugar in small batches (so it doesn't fly out of the mixing bowl), beating in between until combined. Add milk 1 tablespoon at a time.
Note: Start with room-temperature butter (not melted) and beat with an electric mixer until the butter turns from a yellow to a white tone before adding icing sugar.
If necessary, make buttercream in two batches. Buttercream can be stored in an airtight container for up to 2 weeks in the fridge, but bring it back to room temperature and beat again before using so it is as light, fluffy and soft as possible.
Separate the buttercream evenly into 5 equal parts. Keep 1 part uncoloured, then colour 1 part khaki, 1 part dark purple and 2 parts turquoise as follows. (Feel free to choose your own colour combinations).
Add colour proportionately, a little at a time, mixing well, then continuing to add colour until desired tone is reached.
Khaki: Add cocoa and mix well to make a brown base, then add a few drops of yellow, a drop of blue and a toothpick tip of black
Dark purple: Add a few drops of blue and a few drops of red
Turquoise: Add a drop of yellow and a drop of blue
3. Place the Dolly Varden cake back in the tin and use a serrated knife to cut any uneven rising off the cake to level it. Turn the cake out and place on serving plate.
4. Crumb coat the cake by applying a thin layer of turquoise buttercream with a palette knife or offset spatula to achieve a very thin, smooth finish (you should be able to see the cake through the icing).
Never wipe excess crumb-coat icing back into the main bowl of icing as it will be full of crumbs and spoil the rest of the icing. Refrigerate the cake until dry to the touch.
5. Fit a petal tip to each of the 4 piping bags and fill each with a different-coloured buttercream.
6. Leave a 3cm space at the top of the cake for the pom-pom. Directly below that, and using dark purple buttercream, pipe the ''knit'' zigzag pattern in a circle around the top of cake.
With the khaki icing, repeat the zigzag pattern directly below but slightly overlapping the dark purple row above. Pipe the third row with the uncoloured buttercream and the fourth row with the turquoise icing.
Repeat the rows down the beanie, stopping 4cm from the bottom.
7. Using a palette knife, cover the remaining 4cm of visible cake with leftover turquoise buttercream. Change the icing tip on the turquoise piping bag to the basket-weave tip.
Using the serrated side of the tip, pipe vertical overlapping lines all around the bottom of the beanie to create a band, slightly overlapping the bottom edge of the knit pattern as you go.
8. To make the Pom-Pom.
Change the tip on the turquoise piping bag to the grass tip.
Form the fondant into a ball and push a skewer into the centre. Holding the skewer just underneath the ball, start at the bottom and pipe the pom-pom's long ''grass'' texture in 1-2cm strokes by piping blobs of icing while pulling up and away from the fondant ball.
Pipe clusters close together, ensuring the fondant surface is not showing through. Place the pom-pom on the beanie by carefully inserting the skewer into the top of the cake.
How to pipe knit pattern

Pipe a second line on the opposite diagonal to make a V shape. Repeat, piping diagonal lines to make a zigzag stitch around the cake.