

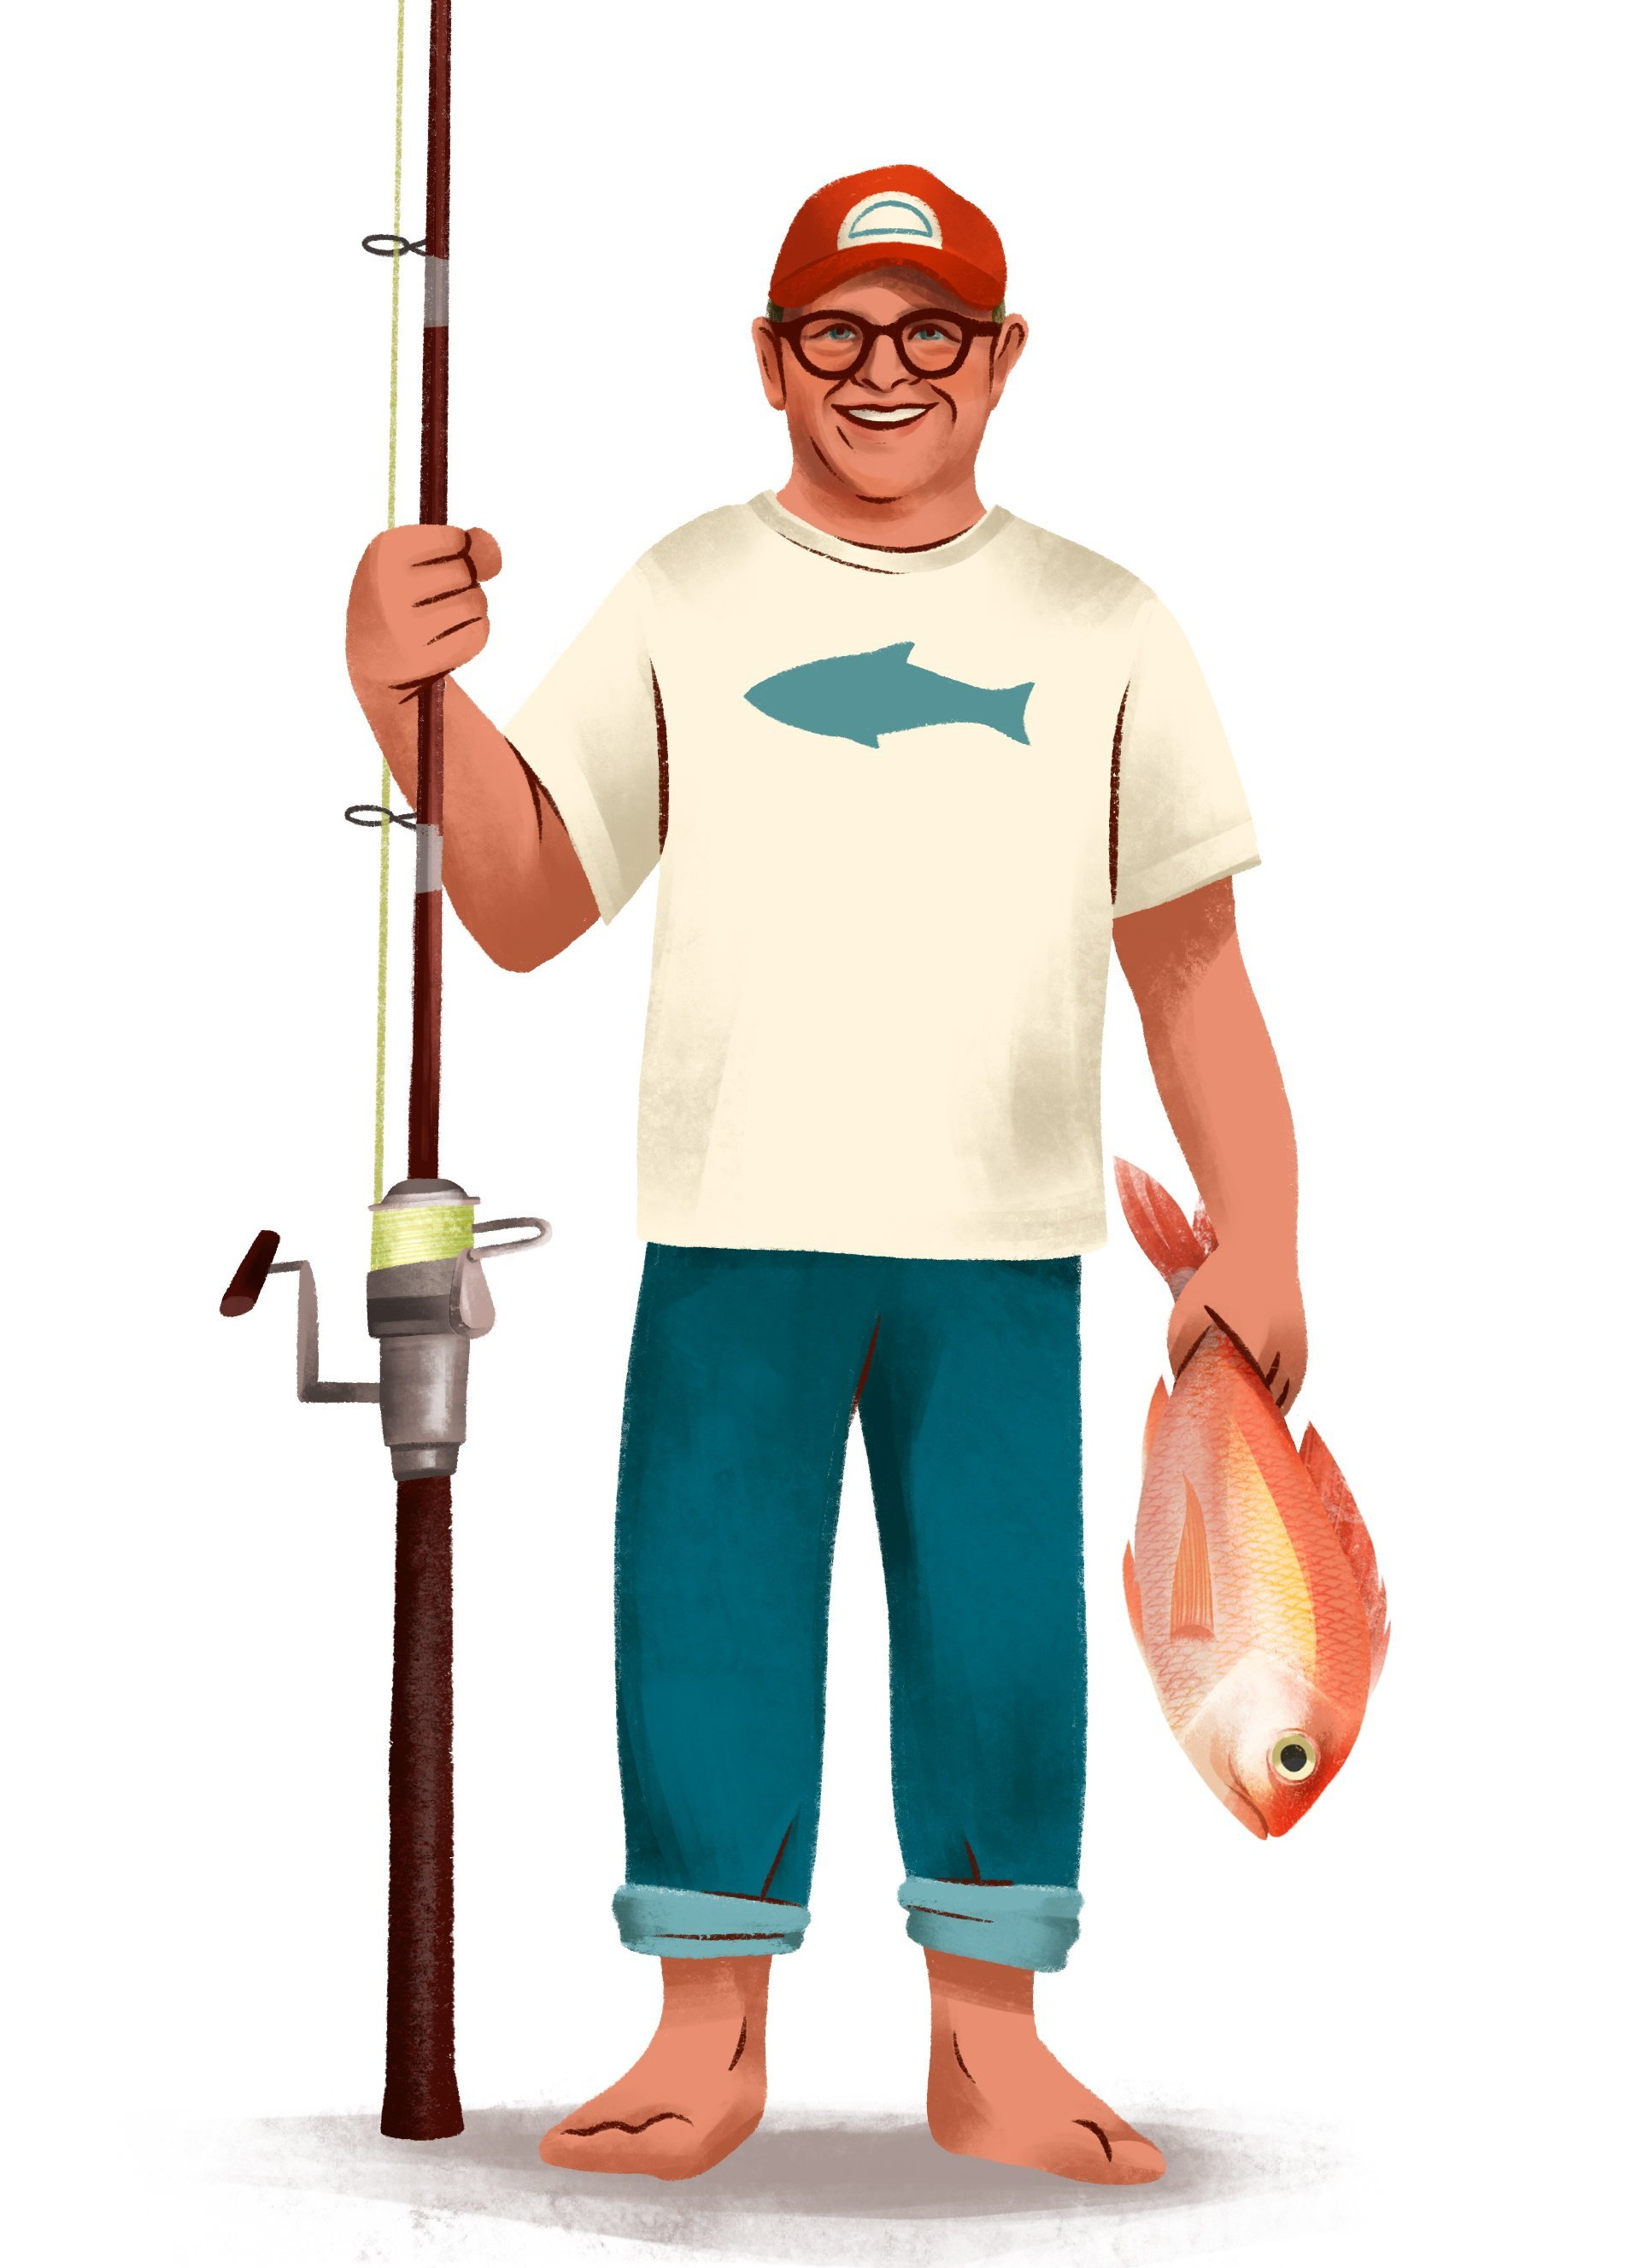
As fishing season opens today, now is a good time to brush up on fish filleting and cooking skills and join New Zealand chef Al Brown in encouraging the next generation of budding anglers to learn the joys of catching a fish.
New Zealand chef Al Brown has always been a keen fisherman and now he is on a mission to see the next generation of anglers get the same enjoyment.
He has written a ‘‘how to’’ book, Hooked, for beginners, especially children, to inspire budding fishers to learn all about the ‘‘wonderful pursuit’’ of how to catch a fish.
‘‘While I have been fishing for as long as I can remember, there is hardly a day when I’m out there doing it that I’m not discovering something new.’’
Brown grew up in the central Wairarapa where there was no lake or ocean and the only fishing option was the ‘‘river’’ - a windy willow-lined muddy creek with a deep hole here and there.
He went eeling most weeks using hessian twine wound around a stick with a basic hook. The bait was whatever he could find.
‘‘If I close my eyes, I can still easily visualise and experience the thrill and elation of seeing a dark serpent-like shape appear from the shadows under the bank, nostrils flared, coming close to my bait ... feeling the weight come on ... that feeling never gets old.’’
They would always let the eels go, unless they swapped them for bottles of fizz with the shearers.
Brown also remembers trolling for kahawai out of a tinny between Kapiti Island and the mainland.
‘‘I’m pretty sure that would have been the first time I held an actual fishing rod with a reel attached. That was a super high-octane fishing experience, and one which I believe lit the spark for a lifetime of chasing aquatic dreams.’’
He still regularly fishes for kahawai with a fly rod - off the boat and from the shore.
‘‘From those early days to my sixtieth year, I have tried all sorts of fishing styles and discipline, and have targetted all manner of fish species here and overseas. I guess like many recreational sports there is a certain tendency to get obsessive.’’
Brown, who finds fishing helps clear his mind, says he loves all types of fishing and fishes out of boats, kayaks or off the rocks.
‘‘I’m mad about walking up rivers with a fly rod, surfcasting off sandy beaches and catching squid in the dead of the night. It all revolves around the anticipation of the adventure ahead. Anticipation of the unknown, the unexpected and the expected.’’
So he knows only too well catching your first fish is a super-special moment and one that will be etched in your memory for the rest of your life, as well as being special for the person who took you fishing. Hooked is full of practical advice for taking those first steps or learning more about the craft from learning the lingo and equipment required to sustainable fishing and safety. Topped off with few of Brown’s favourite recipes.
‘‘I think cooking fish that you have caught yourself is one of life’s real joys. It’s why so many people love to fish.’’
Al brown’s advice to cook the perfect fish fillet
While I love all the recipes that follow, I also enjoy nothing more than a fresh piece of fish, seasoned with salt and fresh black pepper, then simply cooked in a pan with a little oil, finished with a lick of butter and a squeeze of lemon or lime juice. Timeless, and so simple and so delicious.
Tips for cooking fresh fish:
• The thicker the fillet, the longer it will take to cook.
•Oily fish such as kahawai, trevally and kingfish tend to dry out when cooked ... [compared to] fillets of non-oily white fish.
•The golden rule is to always err on the side of slightly undercooking fish fillets, as they will continue to cook a little once removed from the pan. You can always cook them a little more if needed, but there is no going back if you have overcooked a piece of fish.
•You must cook whole fish all the way through, so the fish pulls away from the bones with ease. Cooking ... [with the bone in] also helps to keep the fillet moist.
•Try cooking fish fillets scaled, but with the skin on. The skin ends up as a crispy fish crackling. There is also a micro-layer of fat between the skin and the fillet which again helps to keep the fillet moist.
•Always heat your pan up to at least medium-high heat. I like to use a cast-iron skillet to cook my fish — it’s the original non-stick pan, and it retains its heat when the fish is added to the pan.
•For best results, bring the raw fillets up to room temperature before cooking.
Al Brown’s advice for cooking different varieties of fish
I often find myself harping on about eating the ‘‘other’’ fish to anyone who will listen.
So many people try to only catch the popular varieties of fish when they head out to catch a feed. I get it — snapper, blue cod, tarakihi and gurnard are all delicious to eat. But there are so many other types of fish that taste just as good!
The challenge is learning about different ways to cook and serve certain varieties. For instance, many people think that kahawai are only good for smoking. Codswallop!
Kahawai can be prepared and cooked in nearly every eating situation you can possibly think of: raw (sashimi), ceviche, smoked, grilled, roasted whole, deep-fried in batter ...
You just need to keep a few things in mind:
• If it is a small-flaked fish, chances are it has a more delicate and subtle taste.
Great for cooking, e.g. pan-fried, poached or crumbed.
Examples: gurnard, tarakihi, blue cod, snapper, butterfish, John Dory.

• Larger-flaked fish can handle more robust styles of preparation and cooking.
Think pan-fried, in stews and chowders, barbecued, chargrilled, battered and deep-fried, and crumbed.
Examples: hāpuka, warehou, monkfish, bluenose, blue moki, pōrae.
• Some varieties of fish are described as being ‘‘oily’’ in texture. Oily fish are generally wonderful to sashimi or marinate. The main thing to watch when cooking oily fish is not to overcook them. In fact, if oily fish are still a little raw or opaque in the centre, that’s perfect.
Examples: salmon, tuna, kingfish, kahawai, grey mullet, mackerel, trevally.
• In the past, fishers have generally targeted the larger fish while ignoring the smaller varieties, because they think the smaller varieties are bait fish. Sure, smaller fish do make great bait, but they also reward you in the eating stakes.
This style of eating requires you to slow down a little and be patient, because we often cook small fish whole. This means they stand up to more rigorous cooking styles, such as barbecuing, sauteing, chargrilling and oven roasting.
Examples: yellow-eyed mullet, pilchards, piper / garfish, jack mackerel.
THE BOOK
Images and text from Hooked: Learning to Fish by Al Brown, illustrations by Hope McConell, published by Allen and Unwin Aotearoa New Zealand, RRP $35.
HOW TO FILLET A FISH - with Al Brown
I know this sounds like a bit of a faff, but trust me, if you look after your catch in this way, you will absolutely be rewarded when you come to eat the fish.
I like to keep my fish on ice for at least 12 hours before filleting them. This gives time for the fillets to firm up and makes the filleting process easier and more enjoyable.
Equipment
Here is the equipment you will need for filleting fish:
• scaler
• sharp filleting knife
• kitchen snips/scissors
• chopping board
• clean dry cloth or towel
• bucket
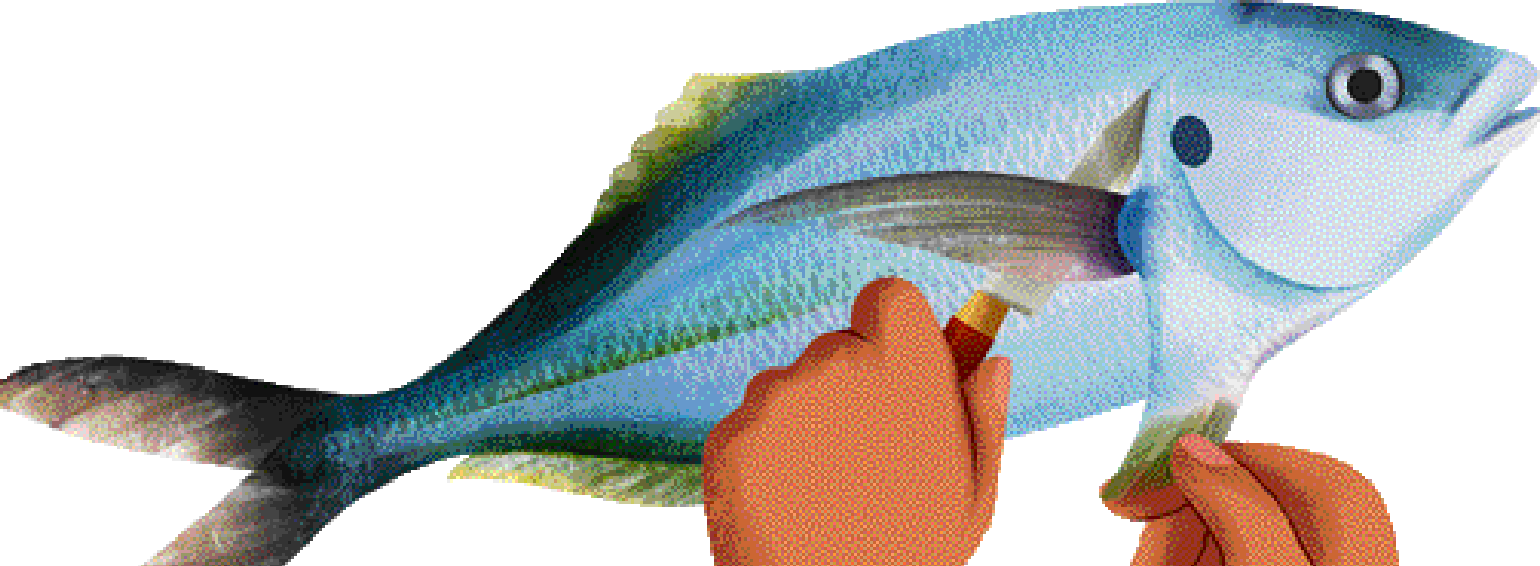
Scaling
‘Scaling a fish’ is the process of removing the scales from the fish while leaving the skin on and intact. I always scale my fish before filleting, as it makes filleting a lot easier and more enjoyable. If possible I also like to scale my fish standing in the sea, as scales go everywhere. A fish scaler makes removing the scales quick and easy.
There are plenty of styles of fish scalers out there, and they are inexpensive. If you don’t have access to a scaler, use something like a dessert spoon. To scale, you simply pull the scaler across the scales from the tail to the head, turning the fish as you go.
Now it’s time to get a bit messy. When learning to fillet a fish, always have an experienced adult supervising you.
Filleting
To fillet a fish:
1. Make sure your fish is dry, so it lays securely on your chopping board and use a sharp knife, preferably a knife designed to fillet fish.
2. To remove the guts, run the knife from the poo hole back to the head. Open the cavity and grab the innards with your hand, then pull them through the opening and discard.
3. Rinse the cavity clean - if you can use salt water, all the better.
4. To remove the head of the fish, on an angle cut down each side of the pectoral fin between the head and the fillets. Use the heel of the knife or the kitchen snips to cut through the backbone, removing the head.
5. If keeping the fish wings (a great idea on a larger fish), lay the head of the fish flat and use the knife to cut out the gills and discard. Cut the triangles that run from the belly up to the top of the head, with the pectoral fin positioned in the centre of both. Check for any pesky scales still attached and remove and discard the fins using the kitchen snips.
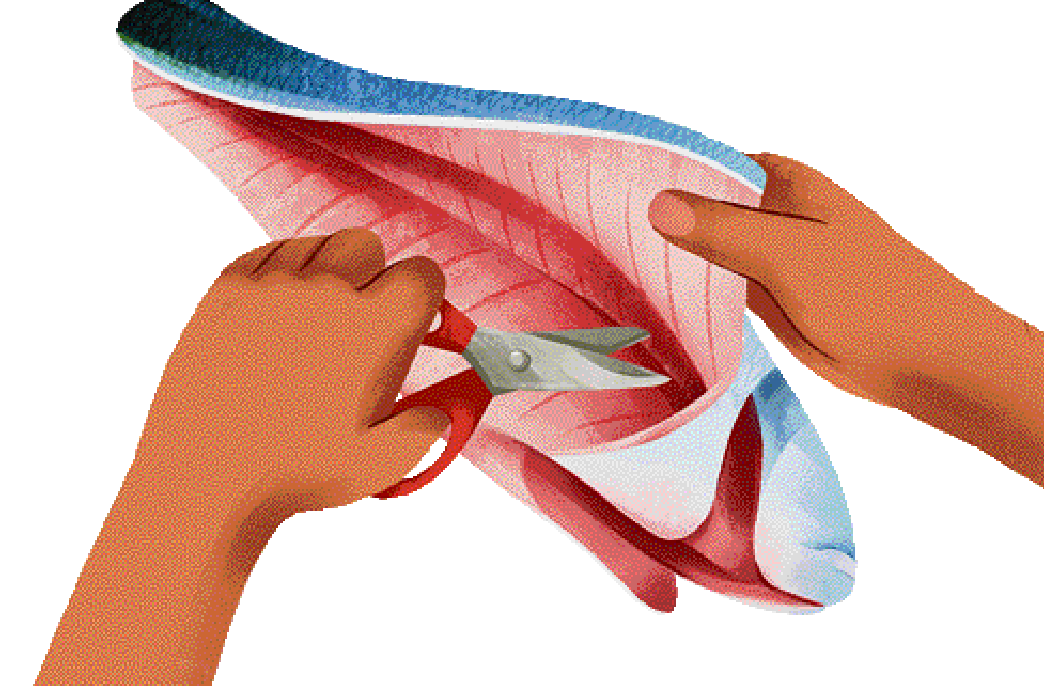
6. Make sure the headless fish is dry and secure on the chopping board with its belly facing you. Run the knife through the skin along the length of the fish, from the head to the tail. As the fish fillet starts to appear, try to keep the blade of the knife gliding along the frame of the fish to eliminate wastage. Glide your knife over the backbone to capture the underside of the fillet. You will naturally hit the rib cage on both sides of the fish. This is where I use the snips to cut through both sides of the rib cage.
7. You now have two separate fillets. Lay a fillet skin-side down and remove the rib bone cavity with the knife. You will notice that there is one more line of bones, which we call the pin bones. Run your knife either side of the pin bones to where they finish, then lift them out and discard. Repeat with the other fillet.

Congrats, you now have two beautiful fillets, plus the head (gills removed), the frame and the trim from the filleting that can be used either to make a beautiful fish stock or as great bait for a craypot. I love to keep the skin on as it’s delicious when cooked, kind of like fish crackling.
If you’d like to remove the skin, though, lay the fillet skin-side down and insert the knife about a centimetre from the end of the tail, between the fillet and the skin.
Holding the tail of the fillet firmly, use a sawing motion to cut against (not through) the skin, pulling the skin towards you, until it has all come away.
Your precious fresh filleted fish is now ready for the frying pan, although if you have looked after and cared for the fish from the moment you landed it, it can keep for nearly a week in the fridge.
Storing fillets
To store the fillets, keep them clean, covered and dry.
I lay them on a couple of sheets of paper towel, then check them every couple of days, as moisture will naturally be pulled from the fillets. Just pat the fillets dry, then discard the old paper towels. Lay the fillets on a fresh towel, cover and place back in the fridge. Don’t be tempted to rinse them in fresh water, as this speeds up the ageing.
• If you can keep all these best-practice points front of mind when looking after your catch, it will soon become a habit. You’ll end up with fish that is delicious to eat and you will be paying the ultimate respect to these special fish that inhabit our coastline.

Fish head and bacon chowder
I believe most New Zealand fishers (myself included) have been guilty of wasting a lot of our catch in the past.
We would whip the fillets off and then discard the rest of the frame, or it would end up in a crayfish pot. Things are definitely changing in this department as we are starting to really understand that fish numbers are finite.
The following recipe uses parts of the fish that used to be thrown away. Fish heads have incredible flavour, so making a stock out of them and turning it into a creamy chowder is a meal to dream of!
Serves 6
Step 1: Fish Head Stock
2 or 3 fish heads (gills removed) and frames
2 onions, roughly chopped
2 carrots, roughly chopped
2 or 3 celery sticks, roughly chopped
½ leek, roughly chopped
3 cloves garlic, roughly chopped
handful chopped parsley

3 bay leaves
12 peppercorns
2 cups white wine
4-5 litres cold water
Method
I like to split my fish heads open with a cleaver or heavy-duty kitchen scissors. It’s optional, but I’m sure it pumps up the flavour.
Take a large saucepan, and add all the ingredients except the cold water. Place the saucepan on medium-high heat, and place a lid on top for about 10 minutes.
Remove the lid, and pour in the cold water. Turn the heat up to high. Once the stock is boiling, turn it down to a simmer. Let it simmer away for an hour or more.
Strain off all the solids, and retain the fish stock.
Taste the stock. There should be great flavour, but if you want to intensify it a bit more place the stock back on the heat and reduce it until you are happy with how it tastes.
Step 2: Chowder
⅓ cup canola oil
250g bacon, diced into small cubes
2 onions, diced into small cubes
2 carrots, diced into small cubes
2 stalks celery, diced into small cubes
1 leek, diced into small cubes
3 garlic cloves, minced finely
120g butter, diced
120g all-purpose flour
1-2 cups fish stock
1½ cups cream
1 lemon, zest and juice
hot sauce, to taste
flaky sea salt & freshly ground black pepper
Method
Place a large saucepan on medium heat. Once hot, add the oil followed by the bacon. Cook over medium heat for 5 to 10 minutes until crisp and the fat has rendered and gone clear.
Add the chopped onion, carrot, celery, leek and garlic. Turn the heat down to low, and cook the veges for 20 to 30 minutes, stirring occasionally, until they are soft.
While the veges are cooking, take another large saucepan and place on medium-high heat. Add the butter and let it melt, then add the flour and whisk until combined.
Add the fish stock a few ladles at a time, whisking continuously. Continue until you are happy with the consistency of the chowder. I like my chowder to be silky smooth with plenty of body, but not too thick.
Add the cream, lemon zest and lemon juice, and some hot sauce to your liking.
Taste, then adjust the seasoning with salt and pepper.
Add the cooked veges and bacon to the liquid. Stir through, then cool and refrigerate until required.
Step 3: Cooking and serving chowder base
1kg seafood of your choice (such as white fish, smoked fish, mussels or prawns)
fresh Italian parsley, finely chopped
fresh dill, finely diced
Method
Heat the chowder over medium-low heat, stirring occasionally.
Once simmering, add the seafood to cook (about 5 minutes).
Finally, stir in the fresh herbs just before serving.
Serve in hot bowls with a big chunk of garlic bread on the side. Nothing could be more Kiwi. Yum!

'Depot' fish sliders
with preserved lemon mayo and watercress
For better or worse, this is my most popular recipe in my 40-odd years as a chef. I have calculated we’ve served over one million of these humble little fish burgers.
Many would say the sliders are my signature dish - it’s a little disconcerting that I’m going to be remembered for my take on a McDonald’s Filet-O-Fish.
Serves 6
Step 1: Preserved Lemon Mayo
1 cup mayonnaise
3 Tbsp finely diced preserved lemon rind
2 Tbsp lemon juice
flaky sea salt & freshly ground black pepper
Method
Place all the ingredients except the salt and pepper in a bowl. Whisk until combined, then season with salt and pepper. Refrigerate until required.
Step 2: Cooking and serving
800g fresh fish (whatever you prefer)
flaky sea salt & freshly ground black pepper
cooking oil
20 slider buns, split in half and buttered on both sides of each half-bun
preserved lemon mayo
watercress or similar leafy salad vegetable
Method
Preheat the oven to 100°C .
Heat up a skillet or flat-top barbecue to medium-high heat.
Slice the fish into pieces about the same width as the slider buns. Season with salt and pepper.
Add a little cooking oil to the skillet, then cook the fish pieces in batches, keeping them warm in the oven once they are cooked.
Wipe down the skillet or barbecue flat-top, then caramelise both sides of both halves of each slider bun.
Spread generous amounts of the preserved lemon mayo on both insides of the bun.
Place a piece of fish on each bottom bun, add a couple of leaves of watercress then top with the lid of the bun.
Serve immediately. They will be gone in a flash.


